Flooring installation
| OVERAGE ALLOWANCES | Order 10% more flooring than square footage to account for cuttings and waste |
| INSTALLATION ON STAIRS OR VERTICAL SURFACES | Voids Warranty |
| INSTALLATION OVER EXISTING CERAMIC TILE FLOORS | Filling grout lines required (follow subfloor flatness tolerances) |
| GLUE DOWN INSTALLATION | Voids Warranty |
| EXPANSION GAP REQUIREMENTS | 10mm around perimeter walls and heavy fixed objects and on area over 400 m2 |
| REQUIRED INTERIOR ENVIRONMENTAL CONDITIONS | 15°C - 30°C [59°F - 86°F] MOISTURE 40-60%, acclimation requirements 48h. |
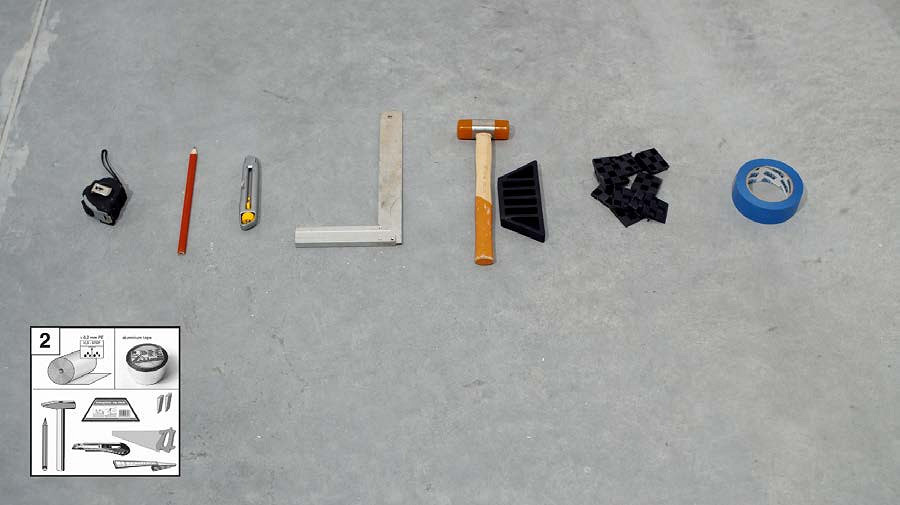
Tools for installation
• Utility knife
• Straight edge, measuring tape, pencil
• Spacers
• Tapping block
• Soft-faced hammer
• Broom or vacuum cleaner
• Felt or nylon pads
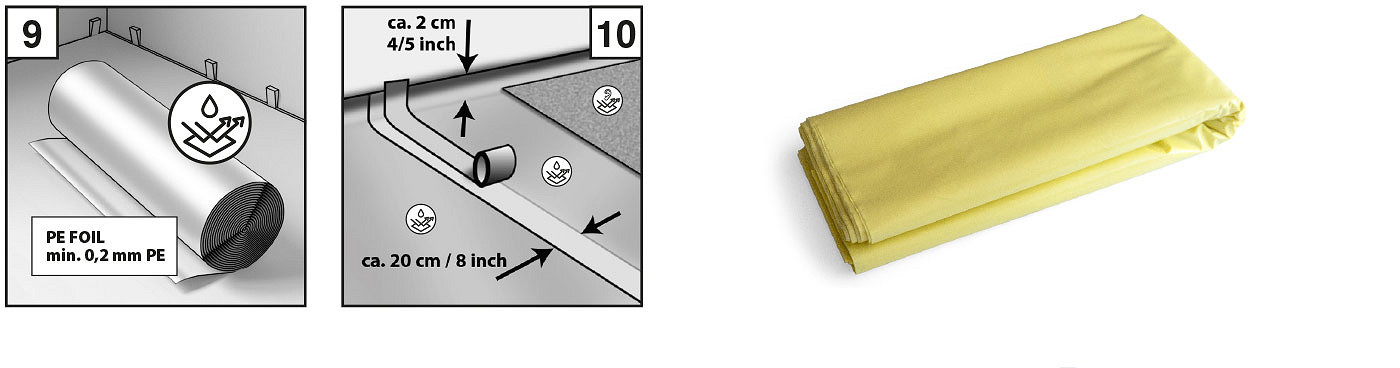
• Vapor barrier foil PE min. 0,2 mm
• Optional: jigsaw, table saw, miter saw, circular saw, hole saw.
Moisture
Test all concrete subfloors for moisture content and document the results. Visual checks are not reliable. Moisture still must be checked even though Rocko Flooring is waterproof in order to protect surrounding structure. Perform tests at locations around exterior doorways, near walls containing plumbing, near foundations walls and the center of the room.
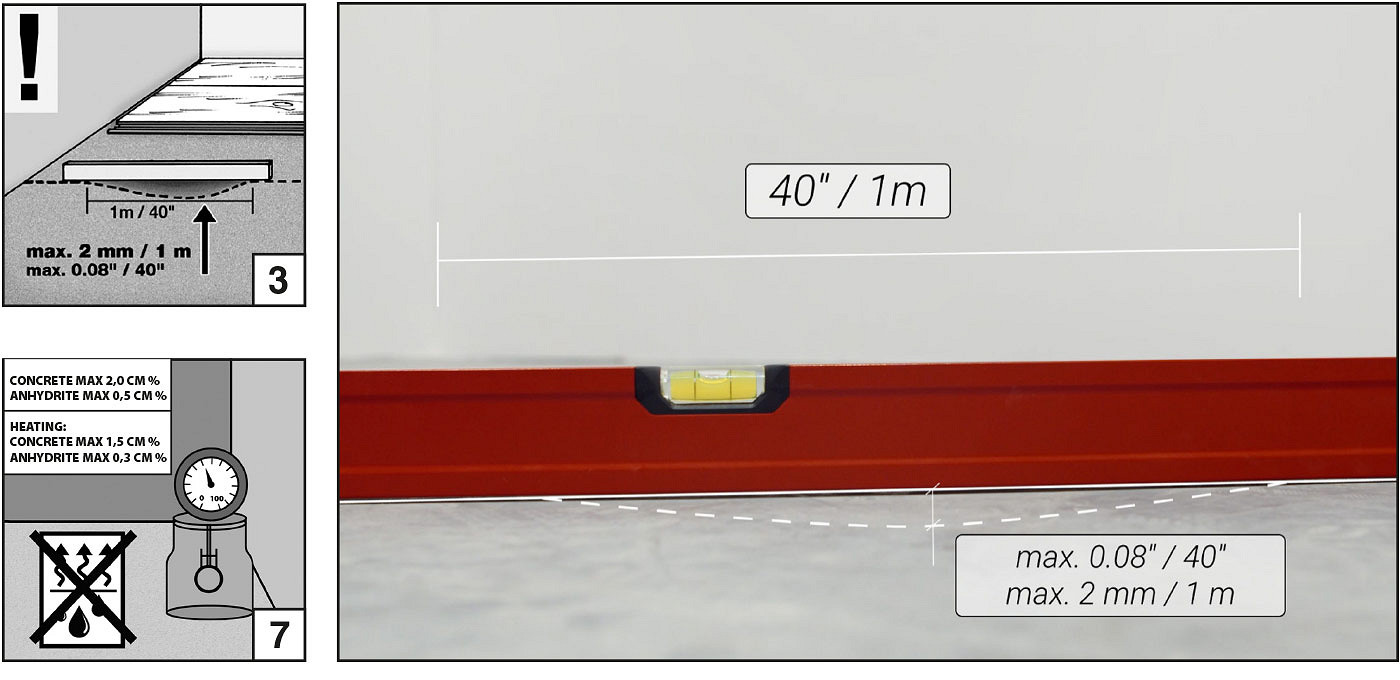
General subfloor requirements
• Must be level to within max. 2mm in 1m [0,08” in a 40”] span. No bumps or low spots.
• Must be clean; no construction debris, soil, mud or any other objects on or adhering to the floor; if necessary, scrape and sweep away before the installation; no protrusions of nails, debris or metals should remain.
• Must be free from moisture-related conditions that can damage the installed flooring.
• Before laying the floor, the subfloor must be secured PE vapor barrier foil, min. 0.2 mm.
• Be structurally sound without deflection.
Aprooved subfloors
Concrete, Plywood, OSB, Particleboard, Tile (Ceramic, Terazzo, Stone).
CONCRETE SUBFLOORS
• High spots can be removed by grinding; depressions can be filled with patching compound formulated for use in floor installation.
• Cure for at least 90 days (applies for newly-laid concrete slabs).
• the maximum permissible humidity is 2% CM and 1.5% CM for underfloor heating
WOOD (PLYWOOD, OSB, PARTICLEBOARD, CHIPBOARD, SOLID HARDWOOD, PARQUET)
• Existing floors must be firmly attached to the structural floor.
• Perform moisture tests using a reliable moisture meter in multiple locations. Moisture readings should never exceed 14% for plywood, OSB, particleboard, chipboard and solid wood subfloors.
• If moisture readings exceed 14%, it should be corrected at the job site before installing [insert brand] vinyl plank flooring.
TILE, TERAZZO, STONE
• Existing floors must be firmly attached to the structural floor.
• Fill in grout lines on ceramic tiles, terrazzo, stone and similar floors with a cementitious leveling and patching compound.
ANHYDRITE FLOORS (GYPSUM)
• protrusions can be removed by grinding; the cavities can be filled with the appropriate one putty compound intended for the floor.
• the floor must be hardened for at least 90 days.
• the maximum permissible humidity is 0.5% CM and 0.3% CM for underfloor heating.
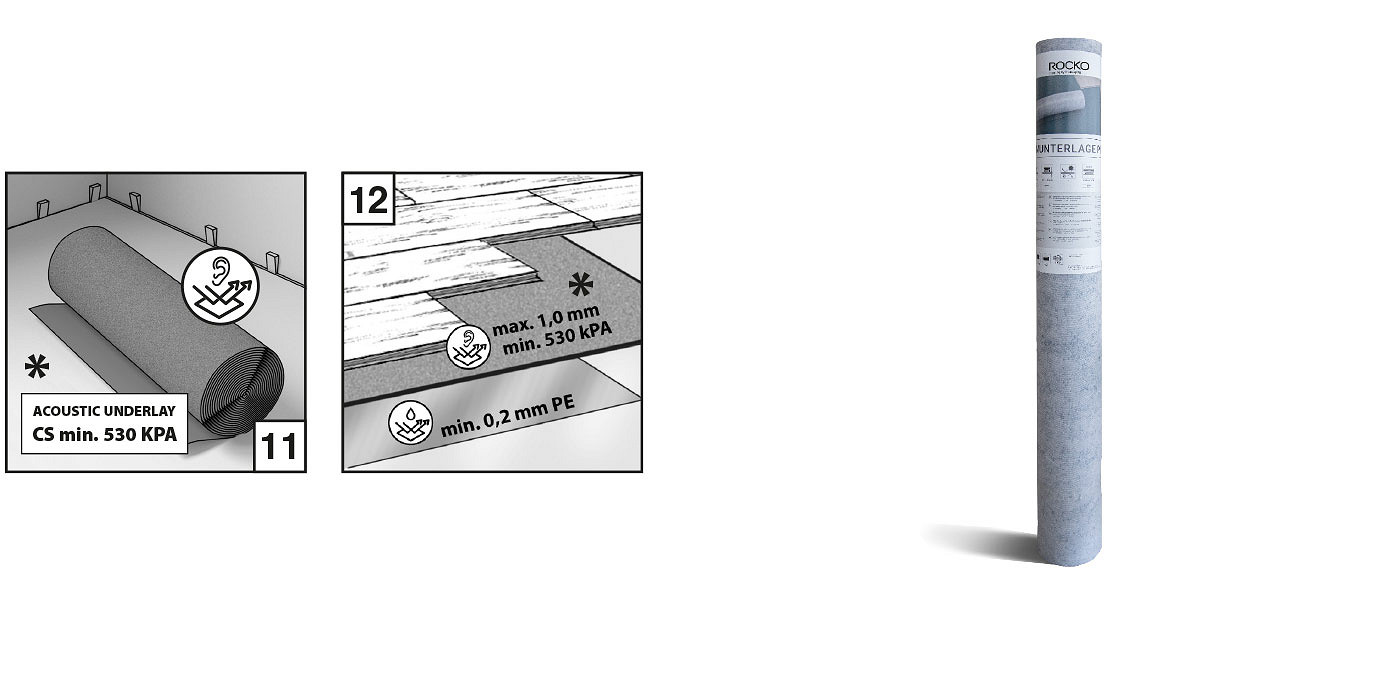
Rocko Flooring can be installed directly on a vapor barrier foil or foil and acoustic underlay.
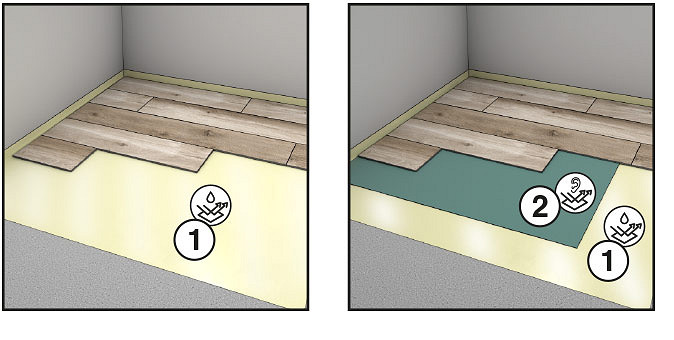
1. PE vapor barrier foil min. 0.2 mm
2. Underlay for panels max. 1 mm, CS min. 530 kPa
Non-aprooved subfloors
Carpeting/carpet pads, floating floors (all types), cushioned vinyl flooring (sheet vinyl), laminate, cork, rubber, underlays with CS<530 kPa, DL<3.000.000 cycles; max. 1mm thickness.
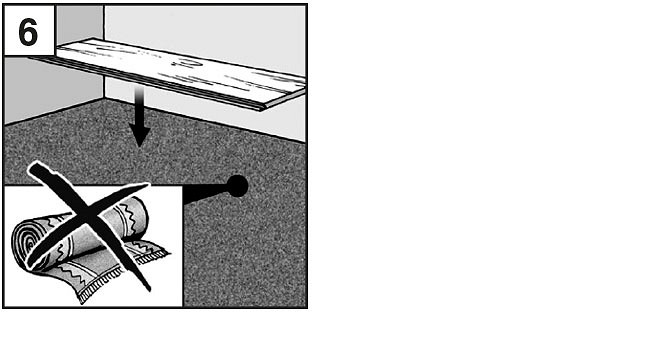
Remove materials listed above and remove old adhesives before installing Rocko Flooring.
In-floor radiant heat
• This floor can be installed over radiant heat concrete subfloors.
• Electric and hydro systems are acceptable.
• In-floor radiant components must be a minimum of 13mm ( ’’) below flooring.
• Floor surface temperature should never exceed [27 C] 81 F.
• Heating system should be operational at least two weeks prior to installation to calibrate temperature settings.
• Flooring cannot be laid directly over radiant heating mats.
• Before laying the floor, the subfloor must be secured PE vapor barrier foil, min. 0.2 mm.

Rocko Flooring can be installed directly on a vapor barrier foil or foil and acoustic backing.
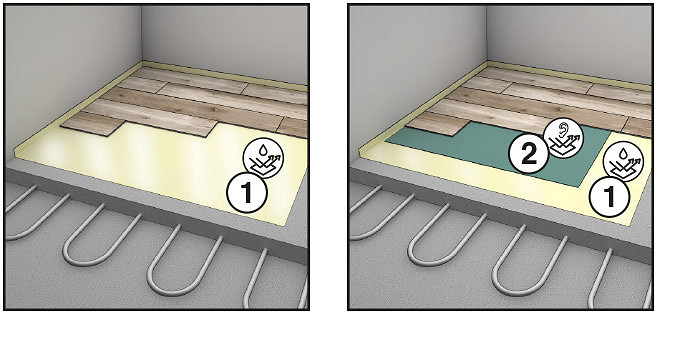
1. PE vapor barrier foil min. 0.2 mm
2. Underlay for panels max. 1 mm, CS min. 530 kPa
Installation
1. The installation of Rocko plank flooring does not generally require acclimation in residential applications if the product is stored properly. If the product is subject to extreme hot or cold temperatures prior installation, allow the product to acclimate to room temperature. The room of installation must be between 15°C - 30°C [59°F - 86°F]. Product should be stored horizontally in dry area in controlled environmental conditions (eg. garages, external patios are not acceptable to store flooring).
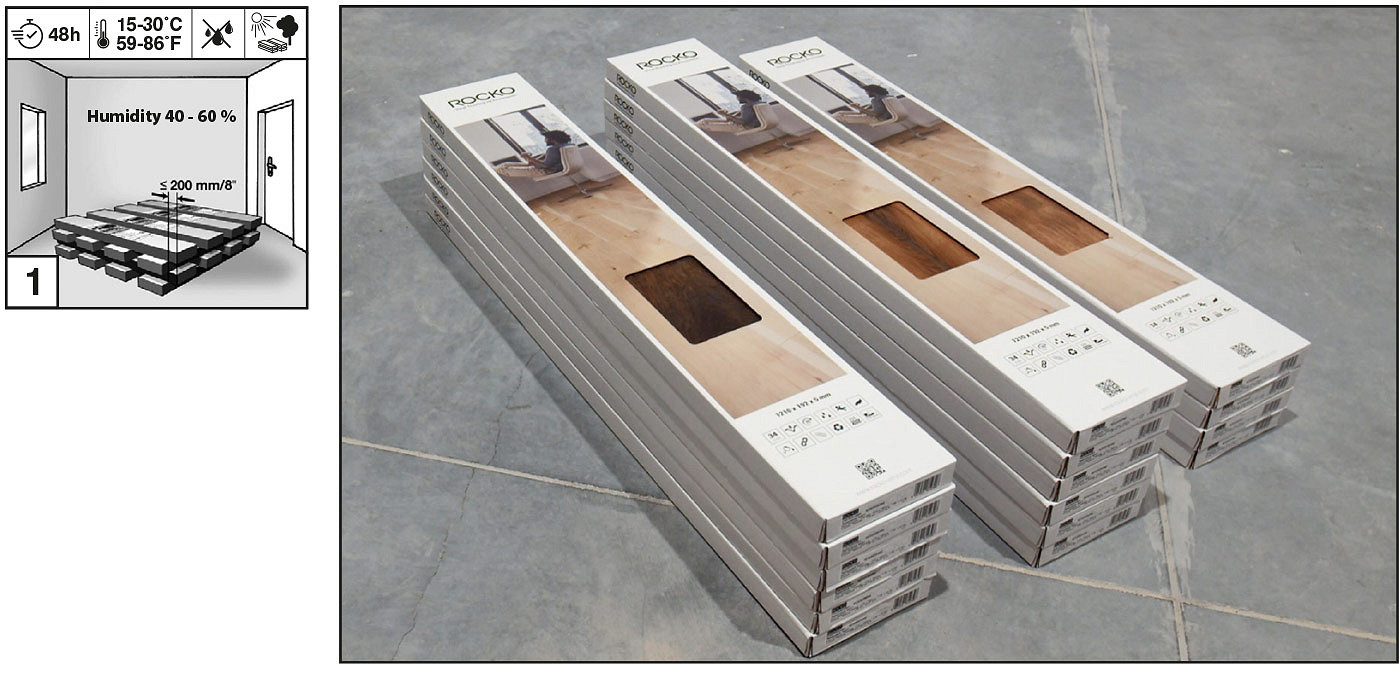
Required temperature 15°C - 30°C [59°F - 86°F]
Acclimatization: Required room moisture 40-60%, time of acclimatization 48h.
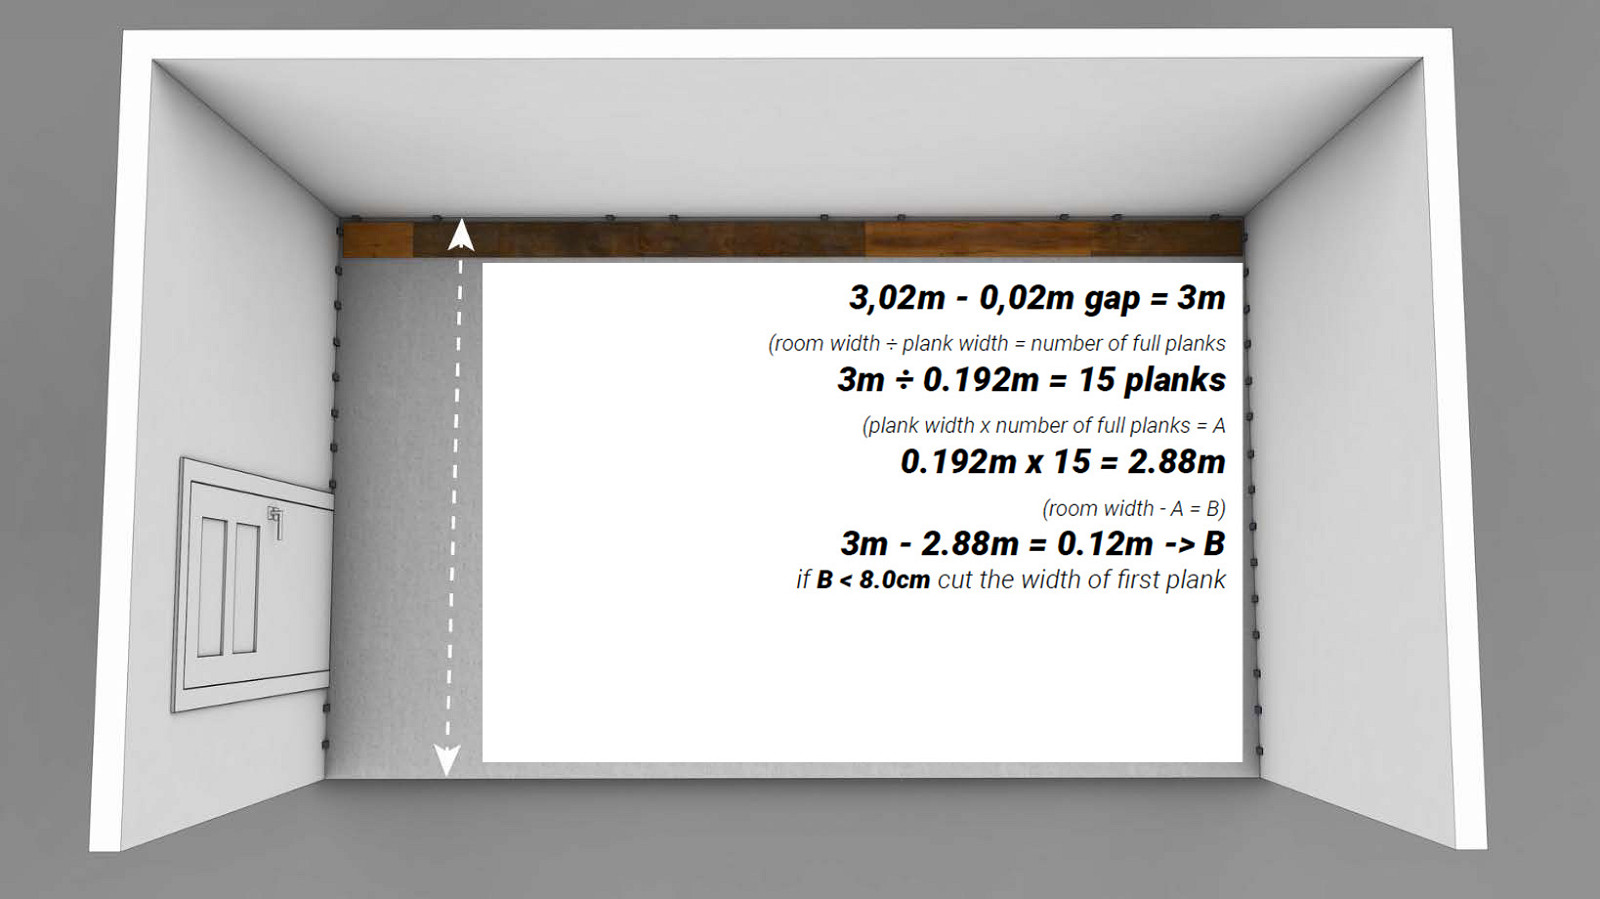
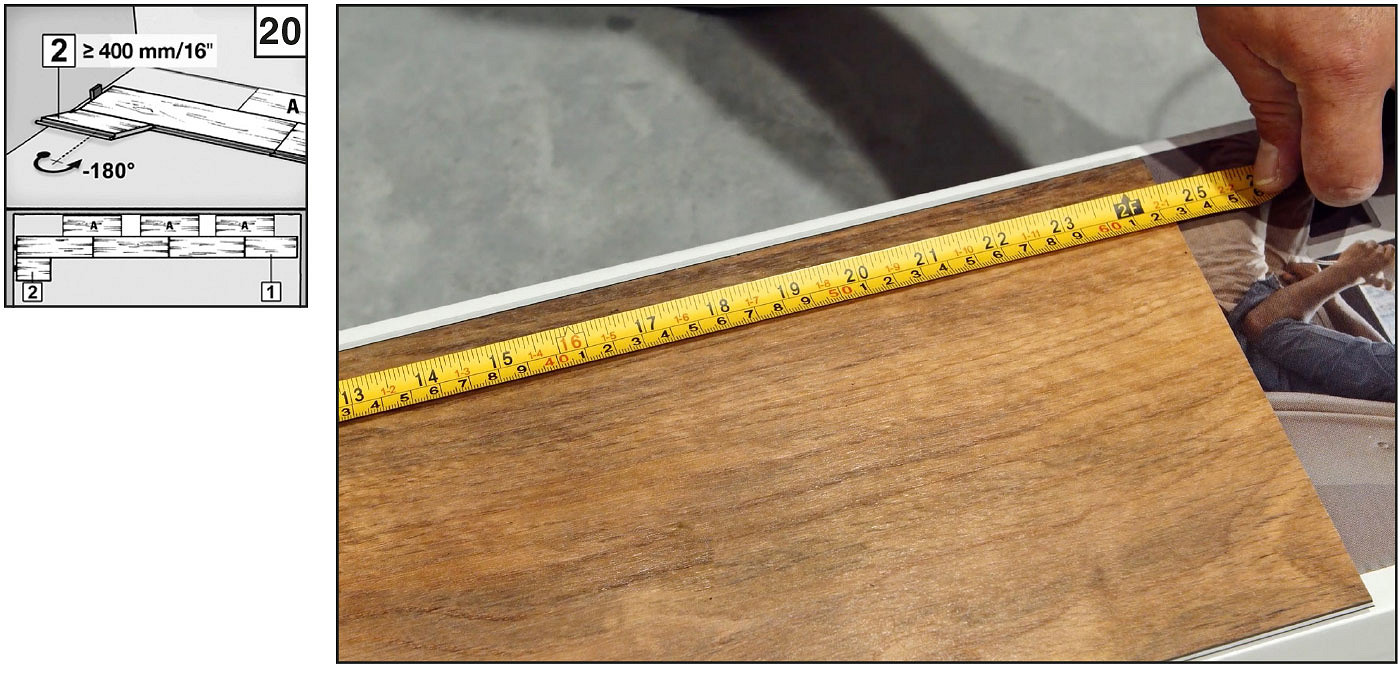
2. Before starting the installation, measure the length and width of the room. Properly planned arrangement of the panels prevents from having very short panels in rows and narrow panel widths at the walls. Remember to keep the minimum board length of 400 mm.
3. Measure the length of the room. Divide it by the length of the planks. If the resulting number is less than 400mm (16”), you will need to cut your first plank accordingly to avoid having planks that are less than 400mm (16”) on the opposite end of the room.

4. Calculate the width of the last row - measure the width of the room and divide it by the width of the plank. If the number is less than half of the width of the plank, then you need to trim first and the last row to avoid too narrow planks.
5. VERY IMPORTANT!
Protect the substrate against moisture. Use a PE vapor barrier foil with a thickness of 0.20 mm, then glue the joints with a vapor barrier foil and fold it over the walls to a height of 20 mm.
An additional acoustic underlay can be used, however, it must meet the following parameters:
- maximum thickness 1.0mm
- minimum compressive strength CS 530kPA
We recommend using a dedicated PUR1.0 polyurethane underlay available from our distributors.
Features of PUR 1.0 underlay
• recommended for SPC vinyl floors,
• suitable for underfloor heating,
• recommended for rooms with high traffic,
• minimizes the risk of breaking the locks during use.
*option
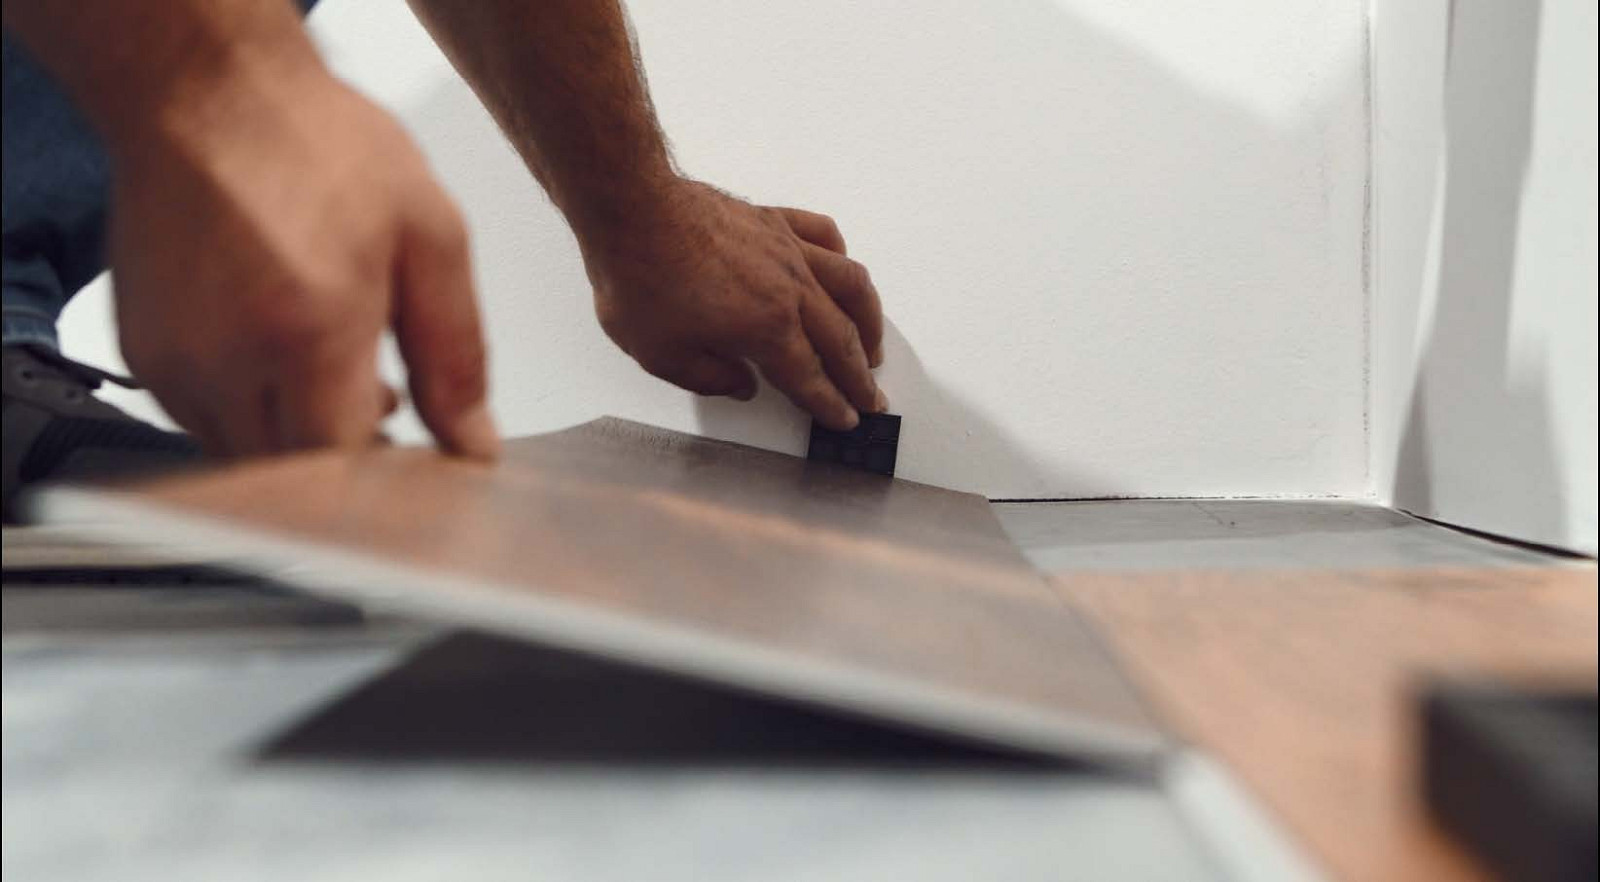
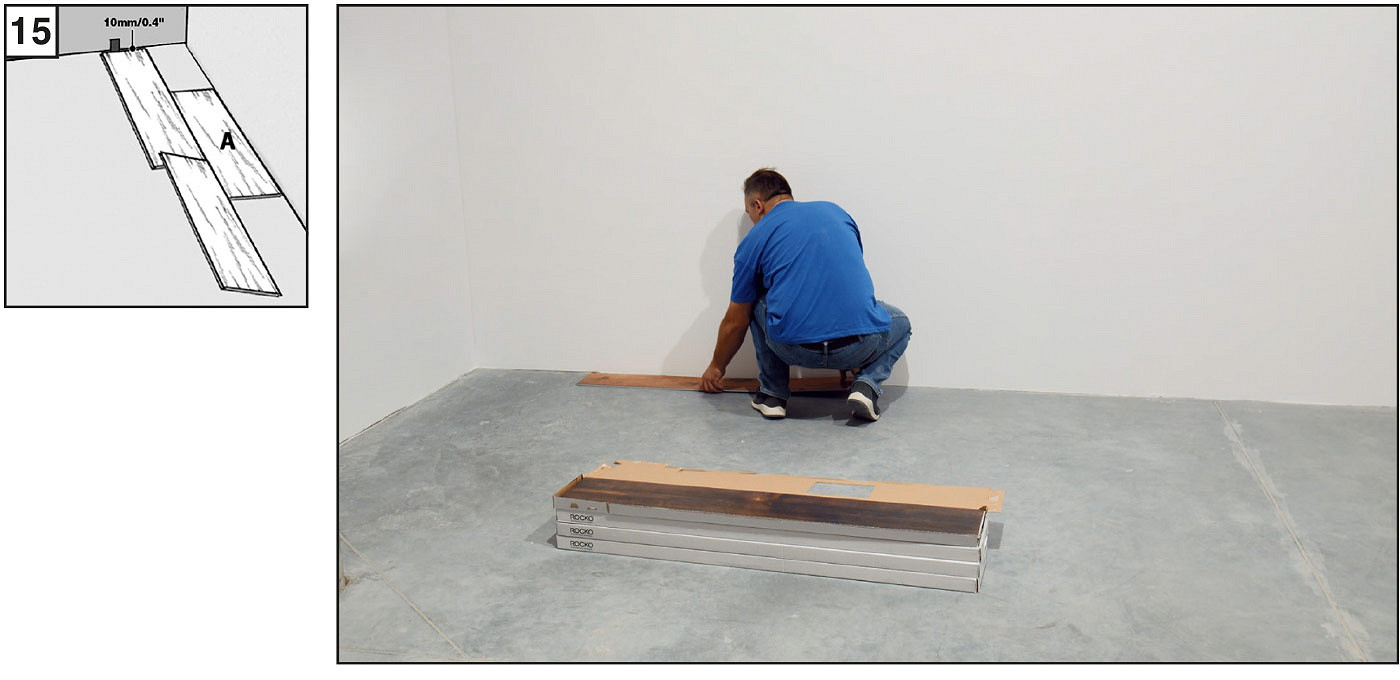
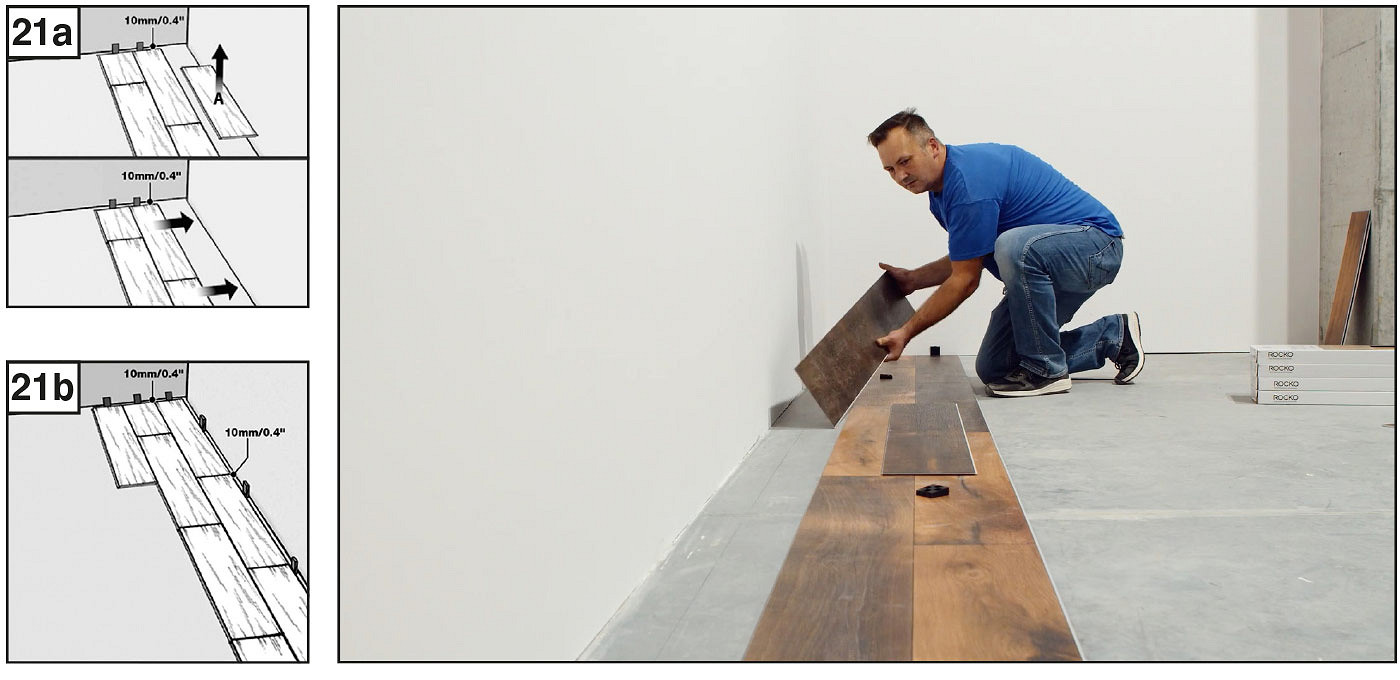
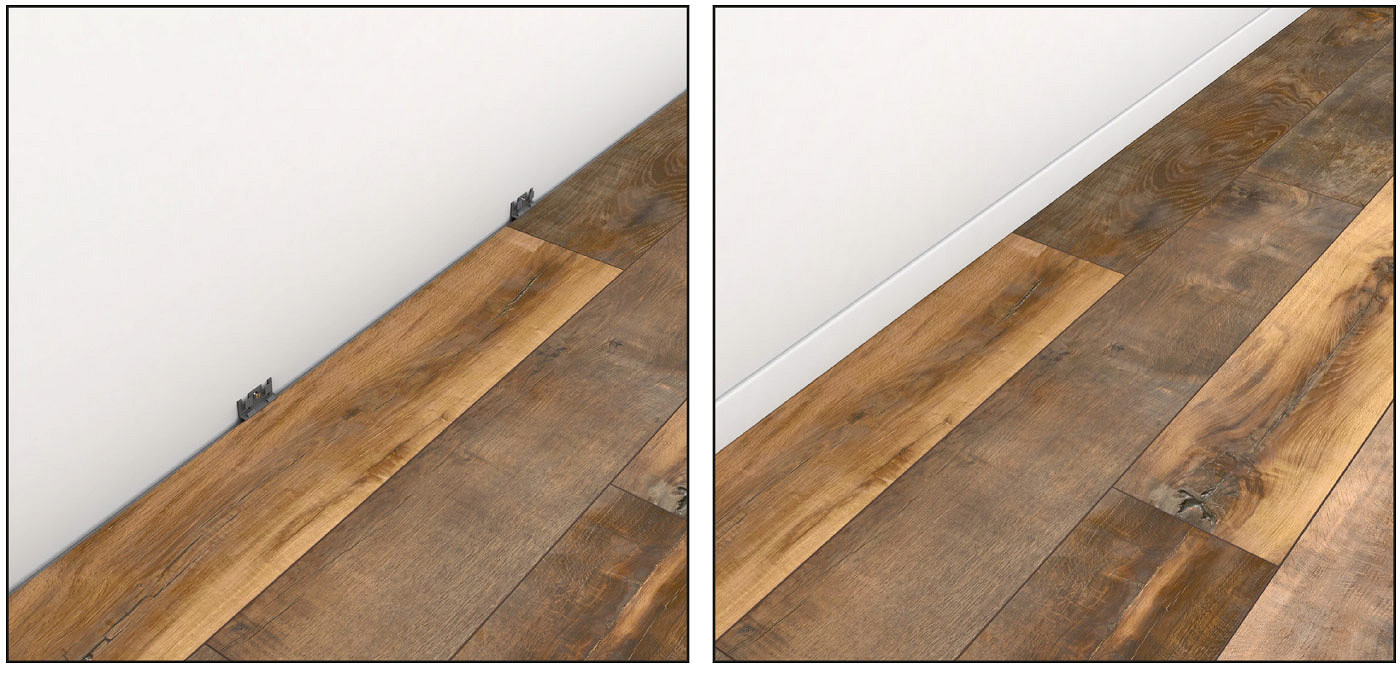
6. Set spacers to allow a minimum gap of 10mm (0,4”) around the perimeter of the subfloor for movement of product expansion. Do not remove the spacers until the installation is complete. The expansion gaps should be covered by skirting boards.
7. Start the installation by placing supporting planks by the wall, keeping the extension gap. You should place one supporting plank per each short seam of first row. Supporting planks will be removed in further installation steps.
8. Start the installation at the left hand corner and proceed with the tongue facing the wall. When starting your first row, lock the two first planks in place by folding down second piece, then tap down on the top of the planks on the short seams using tapping block and a hammer.
9. To cut the end plank in first row, simply mark the proper measurement and score the plank using utility knife and a straightedge, then just snap the plank along the score line. You will also need to back cut the underlayment on the bottom of the plank.
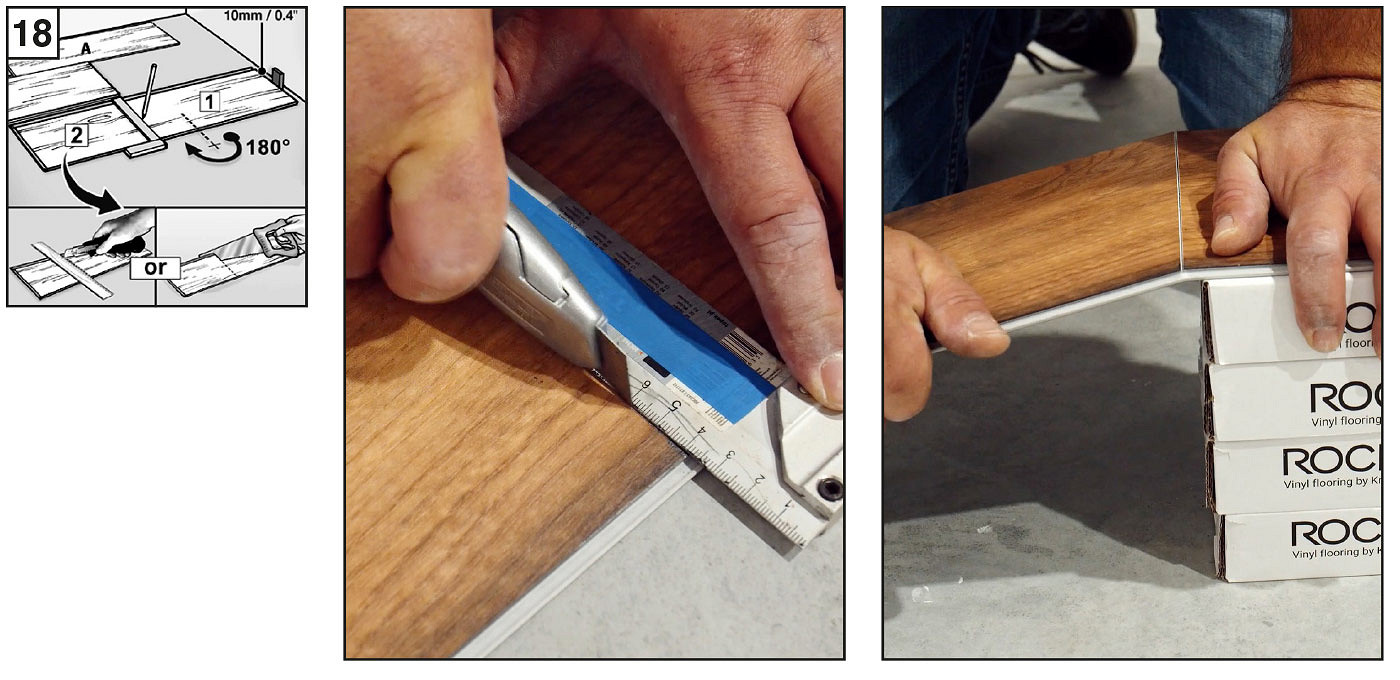
Cut off piece > 40cm | 16”
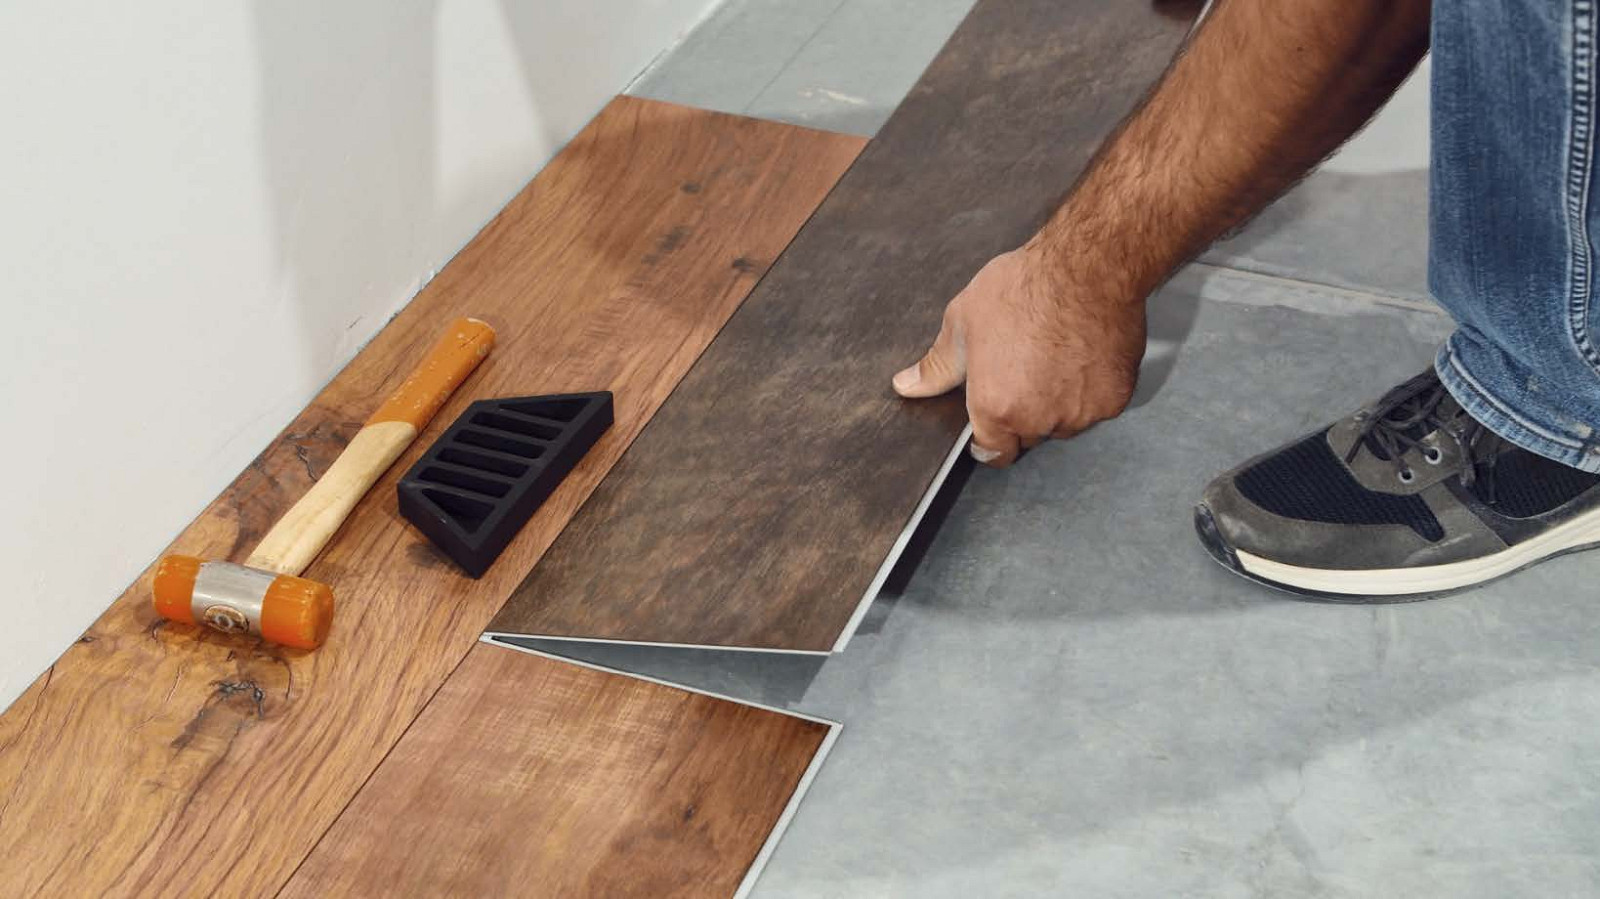
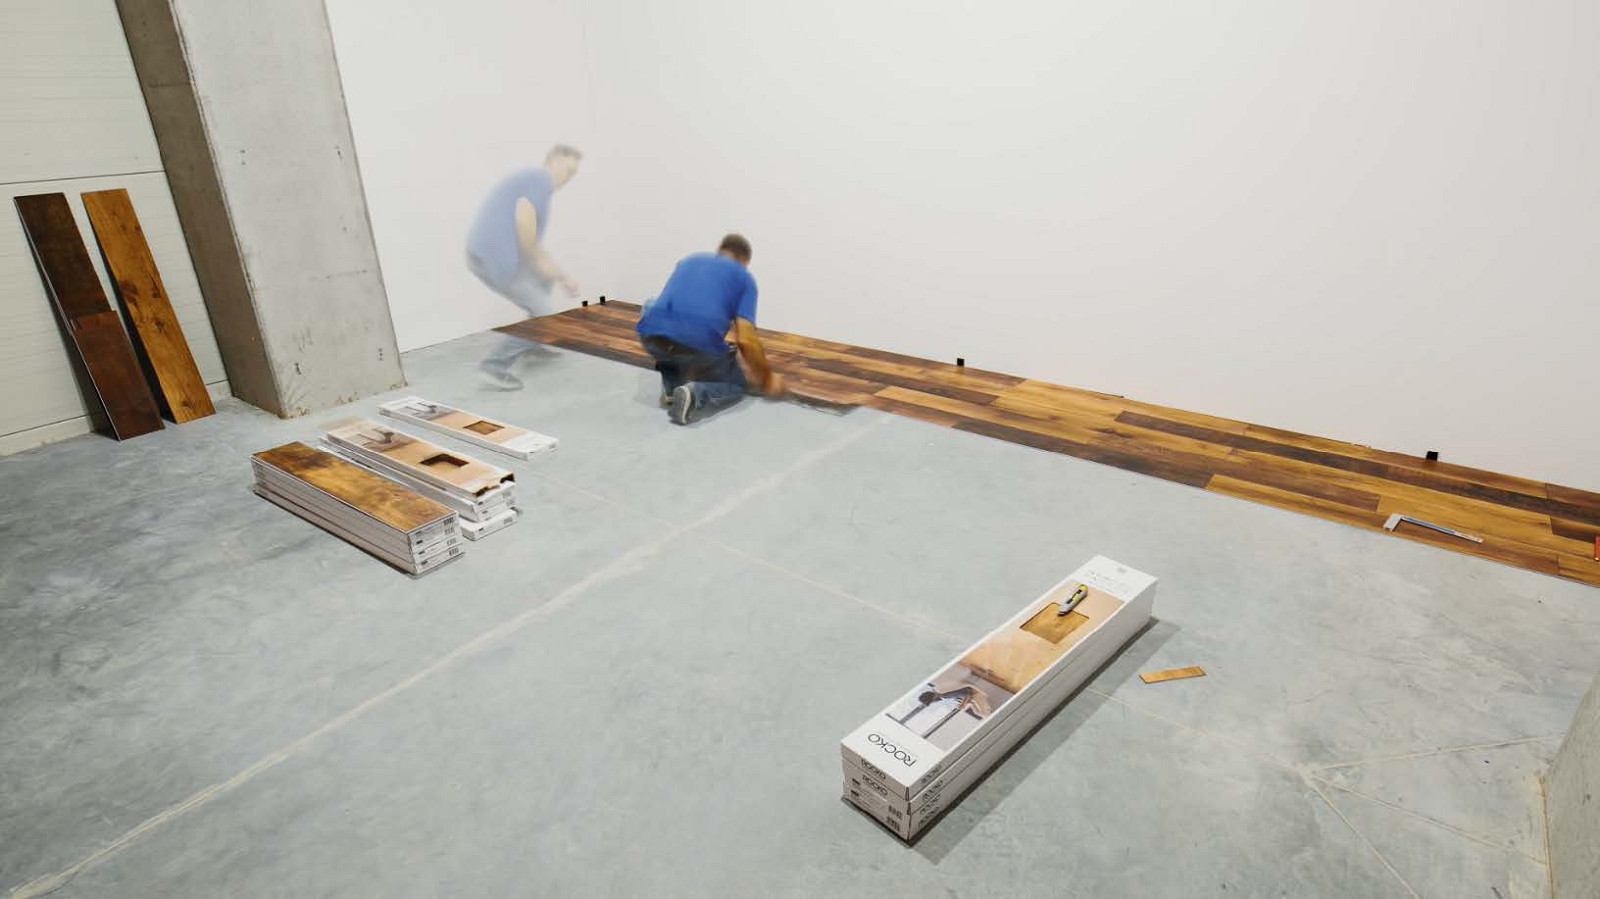
10. When installing second row, connect the long site of the plank first, then slide the plank so the short sites meet. Then drop it lock the short ends. Use a tapping block and a hammer to ensure proper fit on short seams. Continue laying planks as you go until the row is complete.
11. Remove the supporting planks and slide connected panels against the wall.
12. Continue the installation staggering the joints at least 40cm (16-in) and maintaining the extension gap – the staggered seams pattern can be repeated each row, or be random.
13. Cover the extension gaps by the Rocko skirting boards, installed at the end of the project.
14. Fill any expansion spaces around potentially wet areas (such as refrigerators, tubs etc.) with premium waterproof 100% silicone caulk.
15. Remember, the use of transition profiles is required when installing Rocko in a room or area that is larger than 20x20 meters (65 lineal feet) in any direction, so that the floor is separated into sections that are no longer than 20x20 meters (65 ft. x 65 ft.) per section.
16. Save and protect any leftover planks. They can be used for replacement in the event you need to replace a plank in the future.
Click here to download a complete ROCKO Flooring User's Manual