User's Manual - ROCKO Tiles
Rocko Tiles boards are intended for installation inside buildings. The product is intended for finishing wall surfaces, both in dry and wet rooms. Correct assembly and maintenance will ensure long-term use of Rocko Tiles.
The manufacturer is not liable for any damages related to incorrect installation or poor assembly conditions.
WALL TILES INSTALLATION - DRY ROOMS
| WASTE STORAGE |
Order 10% more than the mounting surface to account for cuts and scrap
|
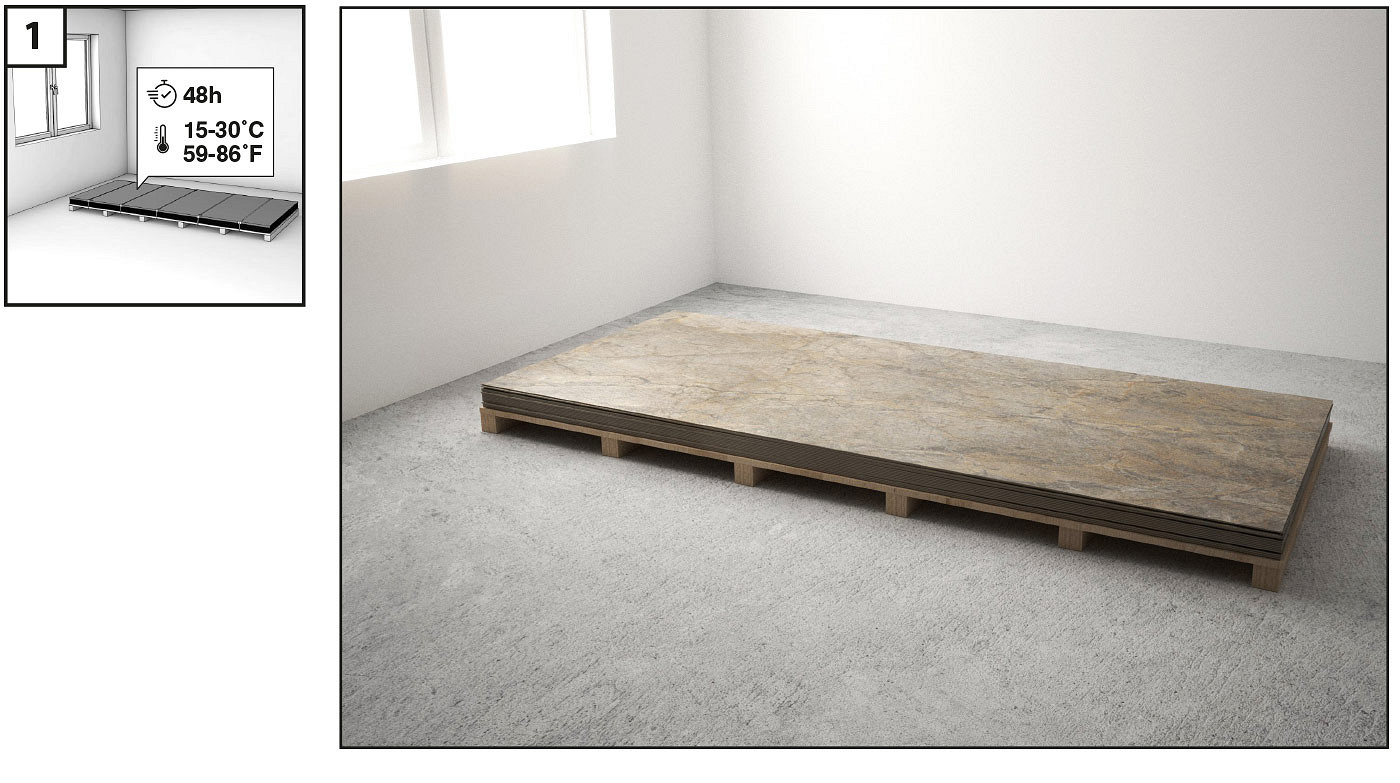
| ACCLIMATION REQUIREMENTS | 48H |
| REQUIRED INTERIOR ENVIRONMENTAL CONDITIONS | 15oC - 30oC [59oF - 86oF] |
| DEFINITION OF ‘WATERPROOF’ | Structural integrity of Rocko Flooring will not be damaged due to contact with moisture/water |
1. Aclimatization
Prior to installation, the Rocko Tiles must be acclimated to room temperature at the installation site. The room where the hob is to be installed must be between 15oC - 30oC [59oF - 86oF]. Rocko Tiles should be stored horizontally, on an even surface, under controlled environmental conditions.
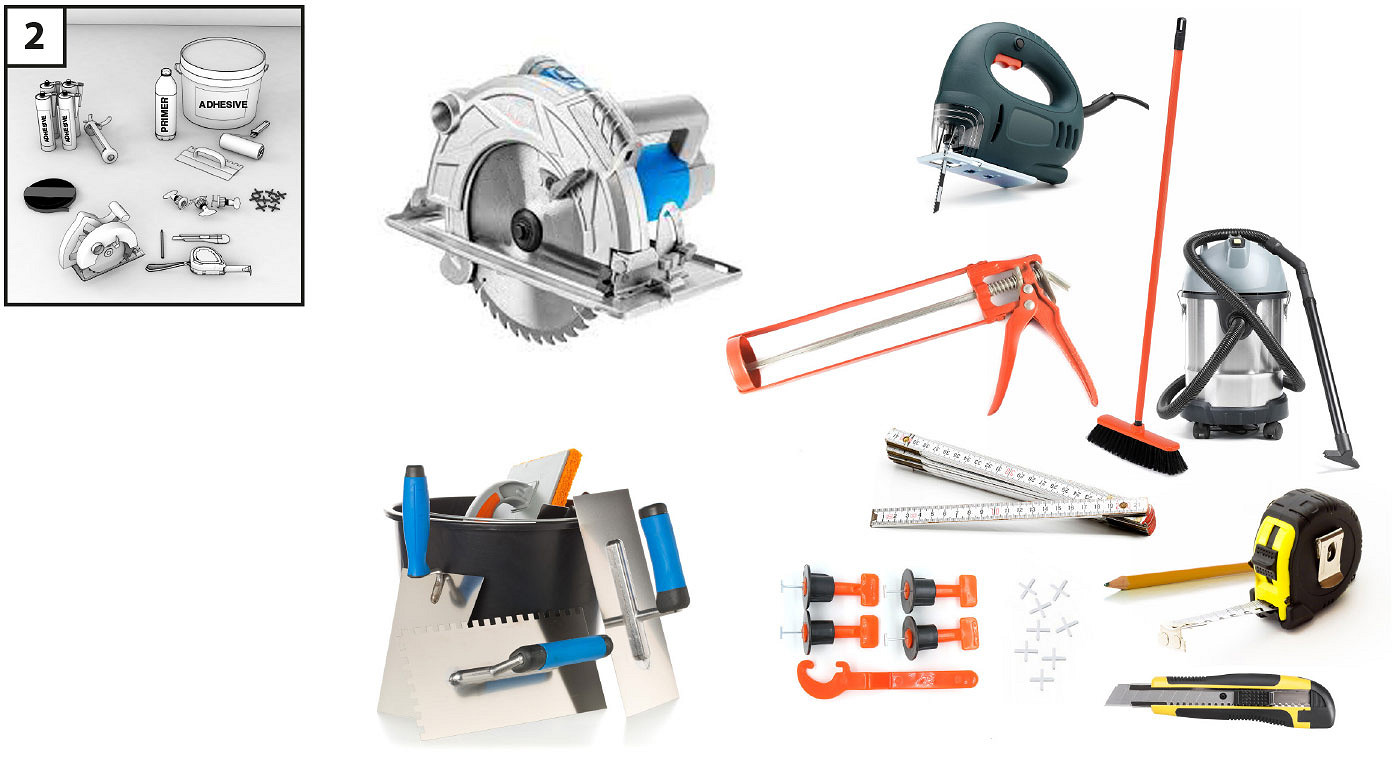
2. Installation tools / Recommended accesories
• Circular saw with guide bar
• Cutting disc - discs with a sufficiently large number of teeth are recommended, e.g. ø165mm (56 teeth) and ø350mm (108 teeth)
• Universal knife
• Ruler, tape measure, pencil
• Distance crosses, clips for leveling tiles
• Glue float, cartridge squeezer
• Broom or vacuum cleaner
• Optional: table saw, hole saw, jigsaw, assembly gripper
3. SUBSTRATE PREPARATION
3.1 SUBSTRATE REQUIREMENTS
![manual_tiles_3.jpg [21.80 KB]](https://rocko-spc.com/storage/image/core_files/2023/2/13/74477eec0084766aa6d48bcb68c9e97d/jpg/rockovinyl/preview/manual_tiles_3.jpg)
WOOD (PLYWOOD, OSB)
• Wooden substrates must be firmly attached to the base structure; Rocko Tiles should not be mounted to unstable, poorly attached base plates
• The substrate must be load-bearing, dry, clean and degreased Ø 165mm (56 teeth) and Ø350mm (108 teeth)
• The substrate must be stable, free from cracks, bends and unevenness
![manual_tiles_4.jpg [25.87 KB]](https://rocko-spc.com/storage/image/core_files/2023/2/13/a65fd6b3c67b39bb1cae2d0208584f4b/jpg/rockovinyl/preview/manual_tiles_4.jpg)
CONCRETE, BRICK
• Wooden substrates must be firmly attached to the base structure; Rocko Tiles should not be mounted to unstable, poorly attached base plates
• Any convexities of the substrate must be removed by grinding; the cavities can be filled with a suitable putty and then primed
• The substrate must be hardened and seasoned according to with recommendations
![manual_tiles_5.jpg [16.33 KB]](https://rocko-spc.com/storage/image/core_files/2023/2/13/28f3b5d86f9cc79162bd9ddc8a4e57e7/jpg/rockovinyl/preview/manual_tiles_5.jpg)
CERAMIC TILES, TERAZZO, STONE
• The existing substrate must be firmly attached to the substructure; do not mount Rocko Tiles to unstable, badly attached tiles
• The surface of the tiles must be thoroughly cleaned and degreased before applying the adhesive
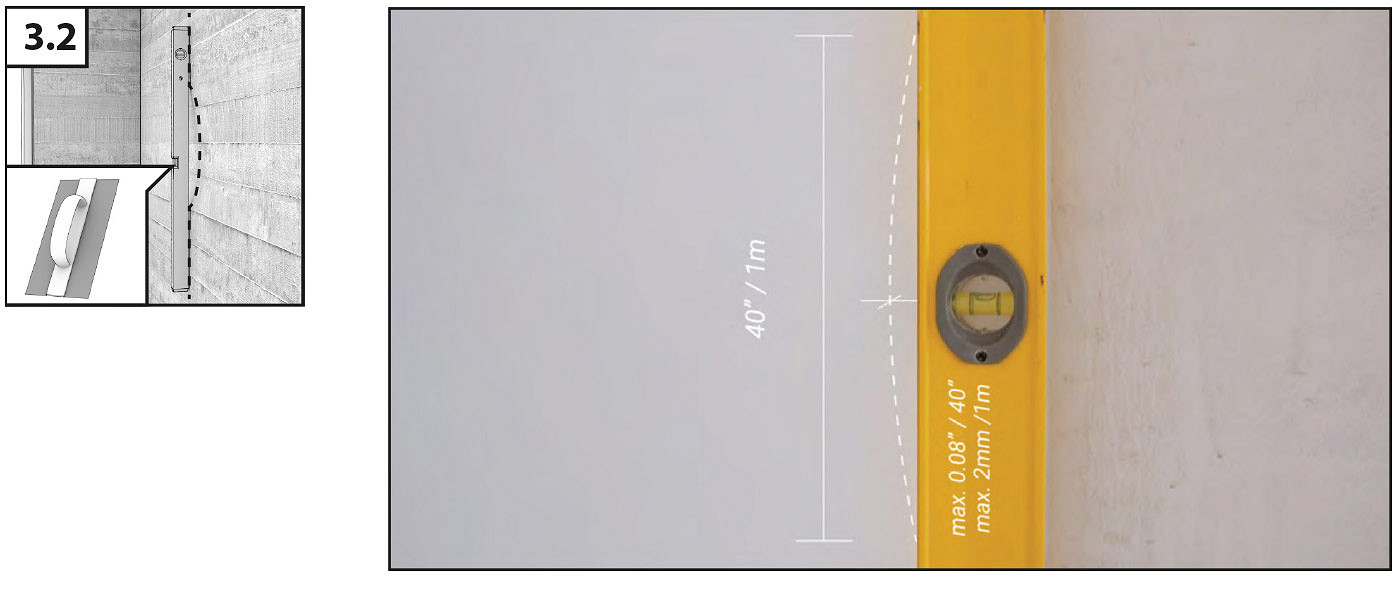
3.2. Ground leveling
The substrate must be leveled within max. 2mm by 1m in length [0.08 "by 40"]. No unevenness, deflection and faults.
3.3. Cleaning the substrate
Clean the wall of dirt and dust and degrease it if you install it on a non-absorbent surface.
The surface must be even and stable.
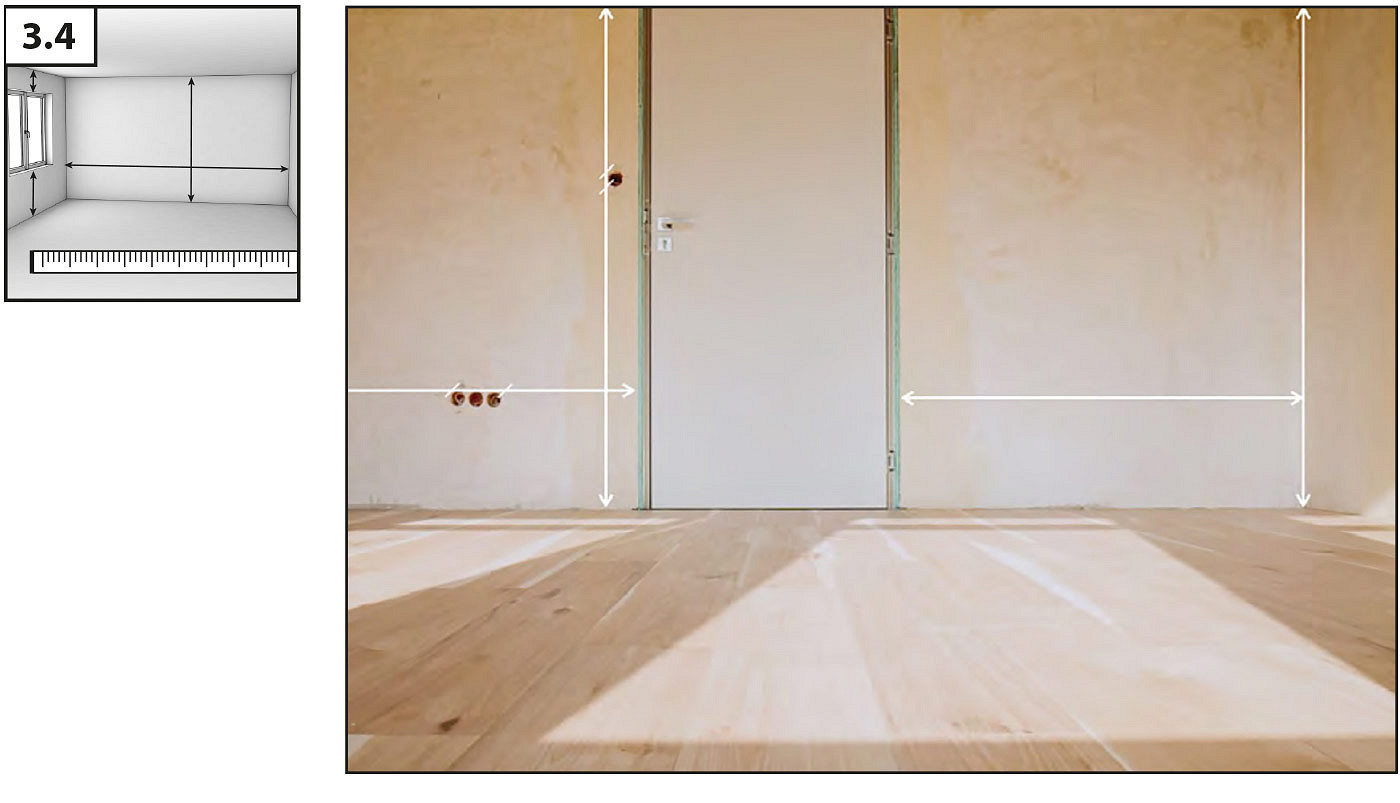
3.4. Surface dimensions
Before starting the installation, measure the lengths of the walls on which the Rocko Tiles will be installed. A properly planned layout of the plates prevents very narrow elements and allows keeping the proportions.
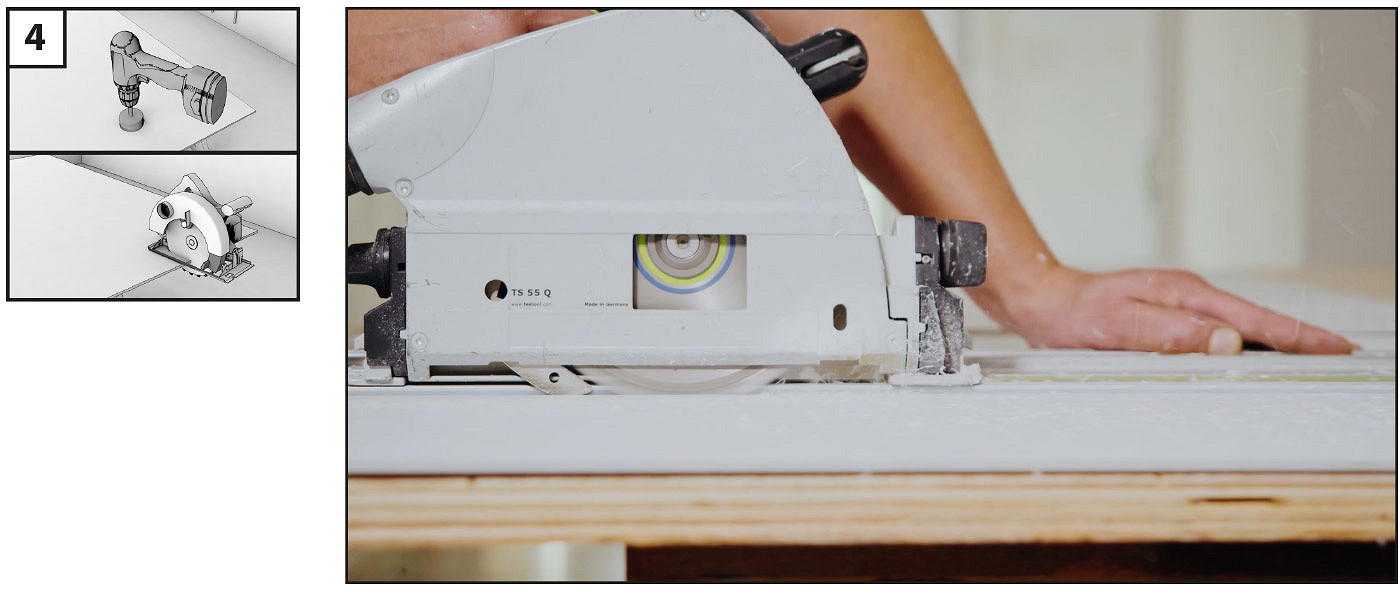
4. Formating ROCKO Tiles
Format the boards with a circular saw with a guide. For cutting, we recommend using discs with a sufficiently large number of teeth, e.g. ø165 mm (56 teeth) and ø350 mm (108 teeth). Remember to cut the board with the decorative surface facing up. If there are electrical sockets or other installation components on the wall surface, cut holes in the board before its installation. Depending on the shape, the holes can be cut with a hole saw or a jigsaw.
5. Cleaning off plate surface
The cut plates must be cleaned. The bottom surface of the boards, on which the glue is to be applied, must be free of dust, dry and degreased to ensure proper adhesion of the glue.

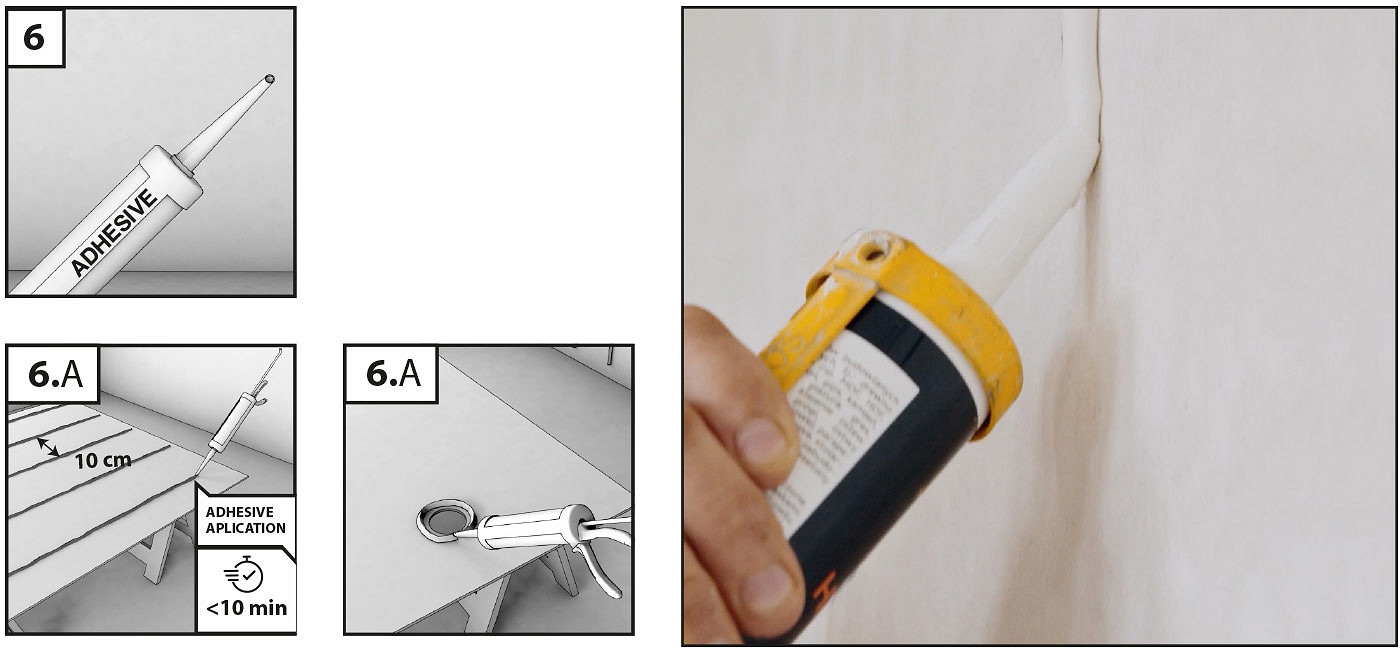
6. Application of adhesive from tube / cartridge / foil package
A. APPLICATION OF ADHESIVE
Apply the mounting adhesive to the bottom side of the panel or the wall surface. If you are using glue in a cartridge or foil-packet, apply it in vertical stripes at 10 cm intervals. Do not apply the glue in spots. Apply glue under the outline of each cut-out hole. The glued surfaces should be joined within 10 minutes of application of the adhesive.
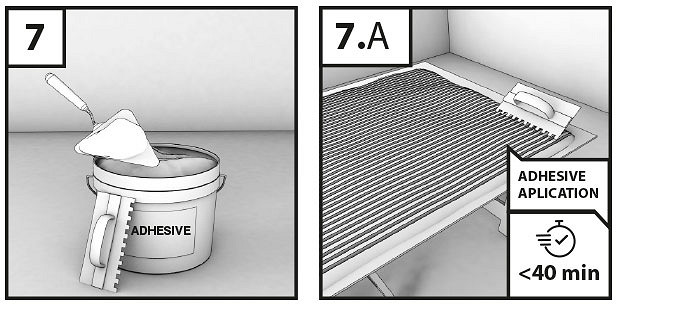
7. Adhesive application with a trowel
Apply the mounting adhesive to the bottom side of the panel or the wall surface. Apply the glue to the entire surface of the glued board. Do not apply the glue in spots. The glue is applied with a trowel (C1) 4x4x4 mm. The glued surfaces should be joined within 40 minutes from the application of the adhesive.
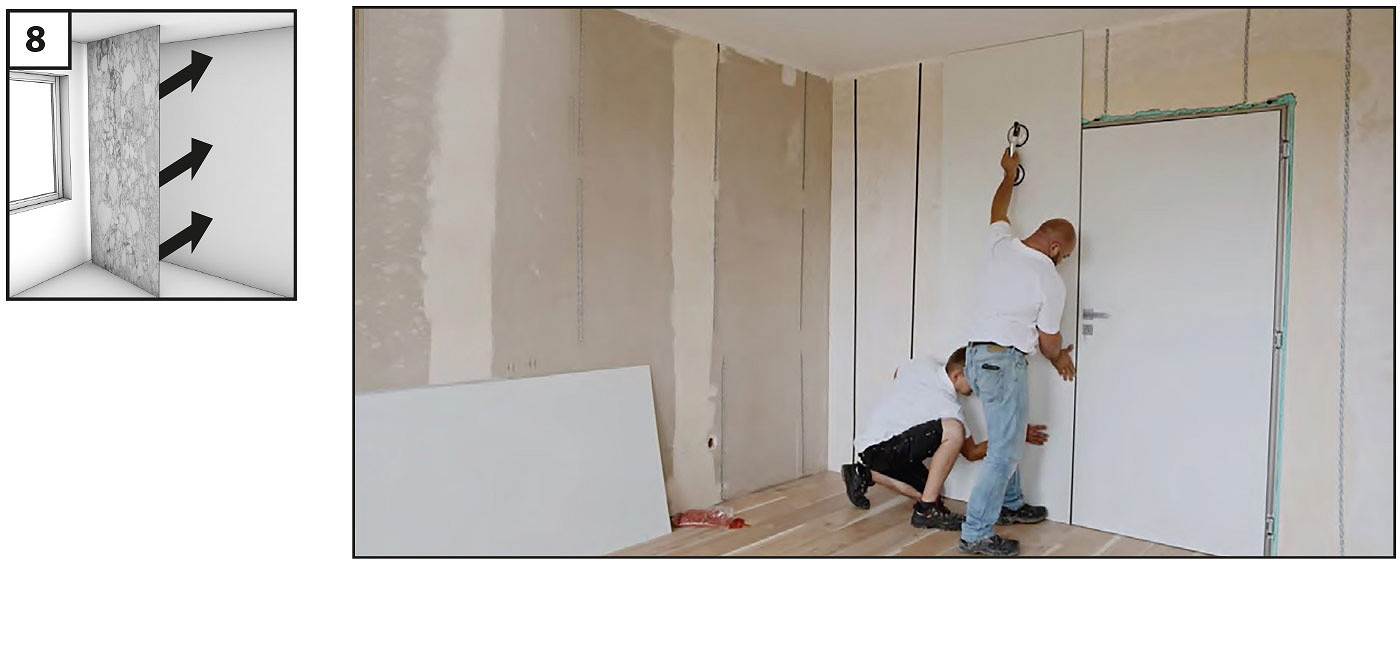
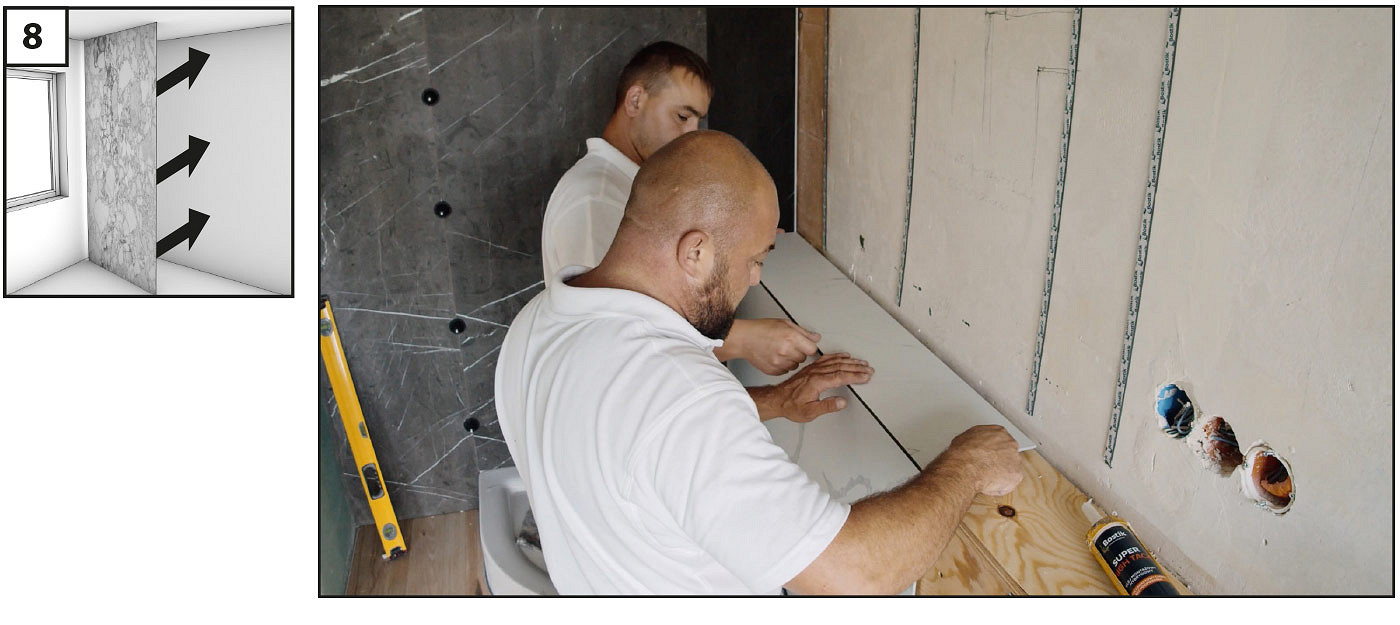
8. Adhering of panels to the surface
After applying the glue, put the board against the wall and press it down. For optimal strength, press the elements to be glued so that there is a ventilation gap of 2-3 mm between them. This distance will ensure that the adhesive joint is able to permanently transmit the deformation.
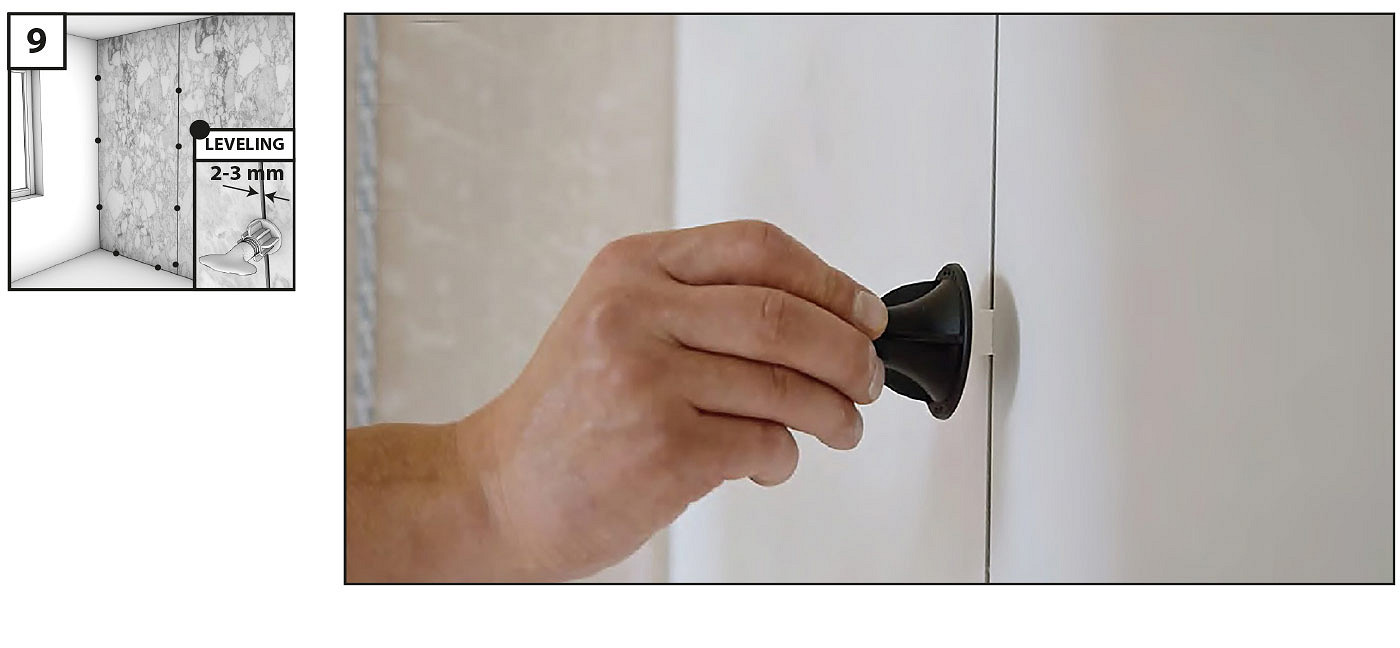
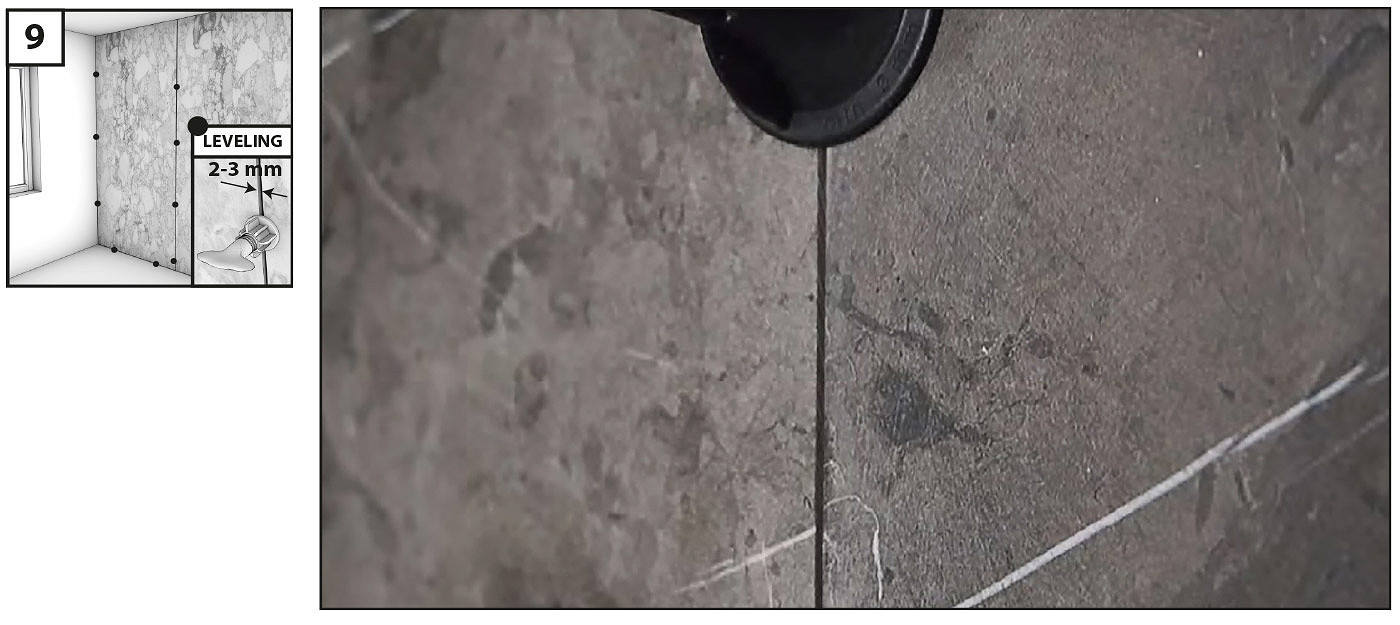
9. Board leveling
After gluing the first board, place the leveling clips - they will allow for the expansion of the expansion gap between the boards (2-3mm) and will facilitate the leveling of the surface. After sticking the next board, level the adjacent surfaces. Do not remove the leveling clips until the adhesive has set. Continue with the assembly of the next plates.
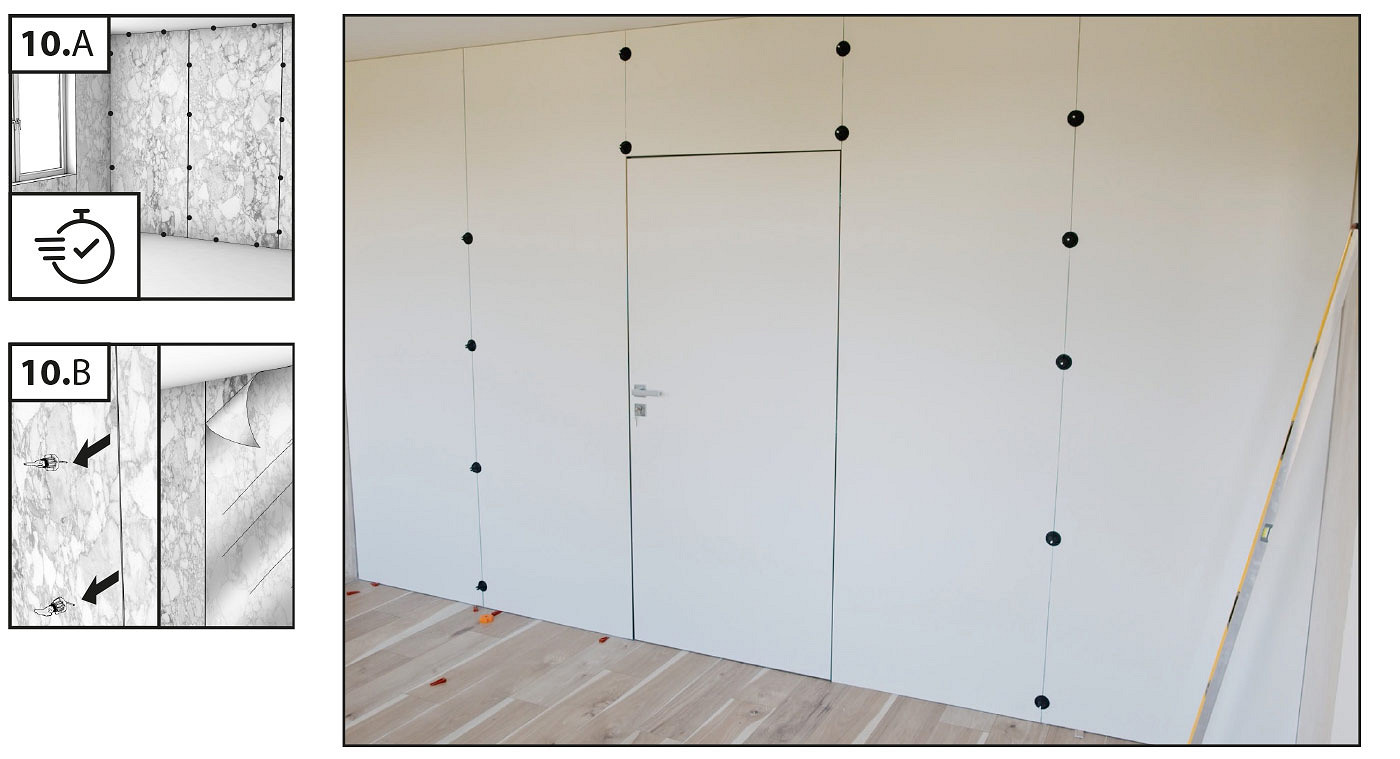
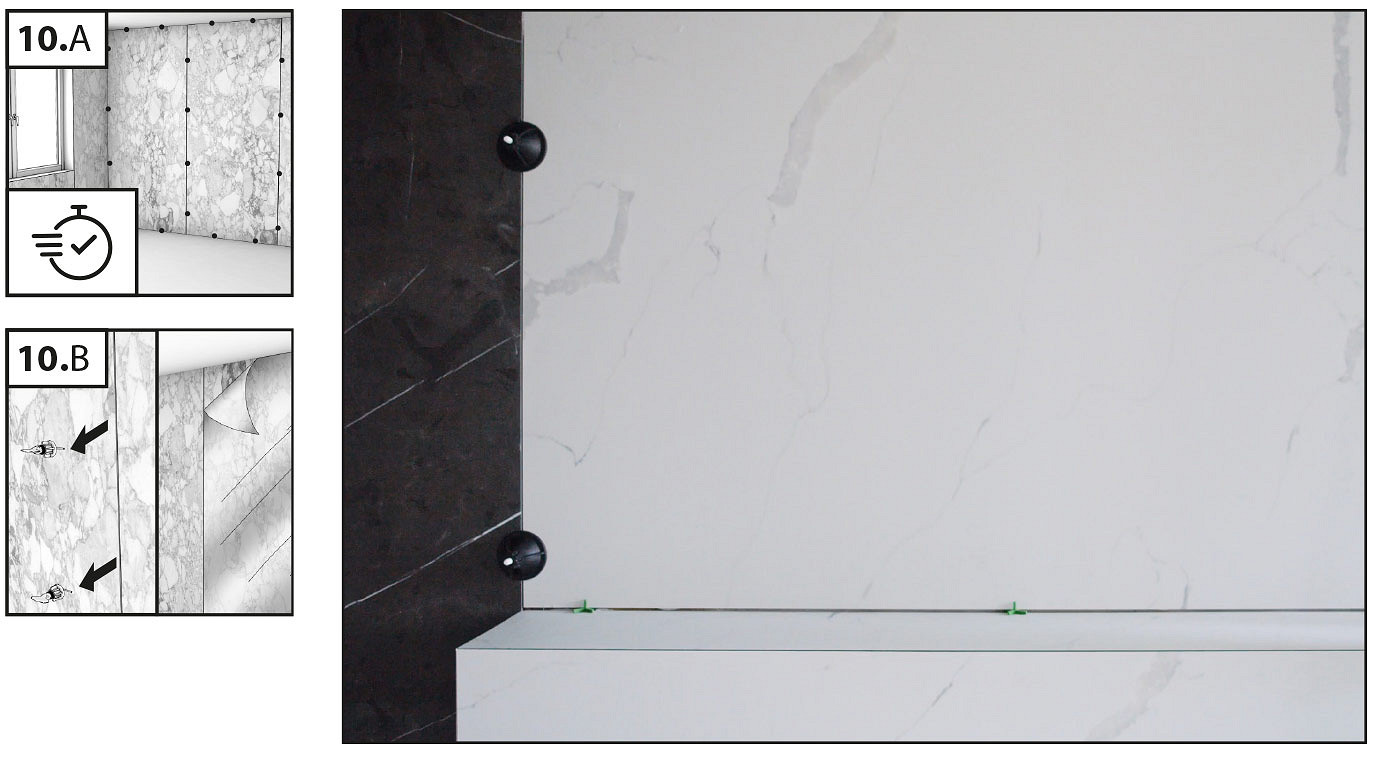
10. Removal of the clips and protective film
The curing speed of the adhesive depends on the ambient temperature and air humidity (24-48 h). As the temperature and humidity level increase, the polymerization process is faster. Provide effective ventilation until fully cured. After completing the work and setting the glue, remove the leveling clips and then remove the protective film from the surface of the boards.
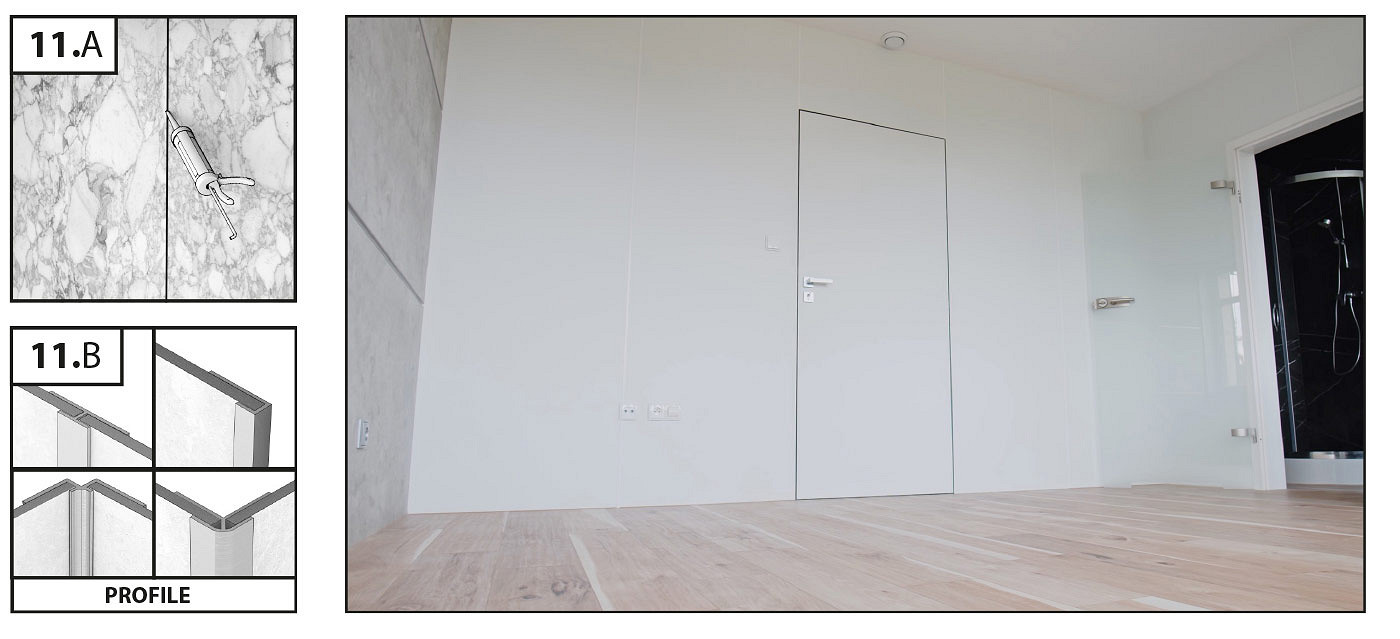
11. Filling out the joint
Expansion joints should be filled with a flexible joint (epoxy, silicone) or with dedicated finishing profiles. Before applying the grout, protect the surfaces along the expansion joint with painter's tape - this will facilitate the grouting process and protect the surfaces from dirt. The profiles should be installed during the assembly of the panels. For mounting the profiles, use the same glue that you use for gluing the boards. During installation, fill the internal surfaces of the profiles with silicone in order to seal the profile-board connection.
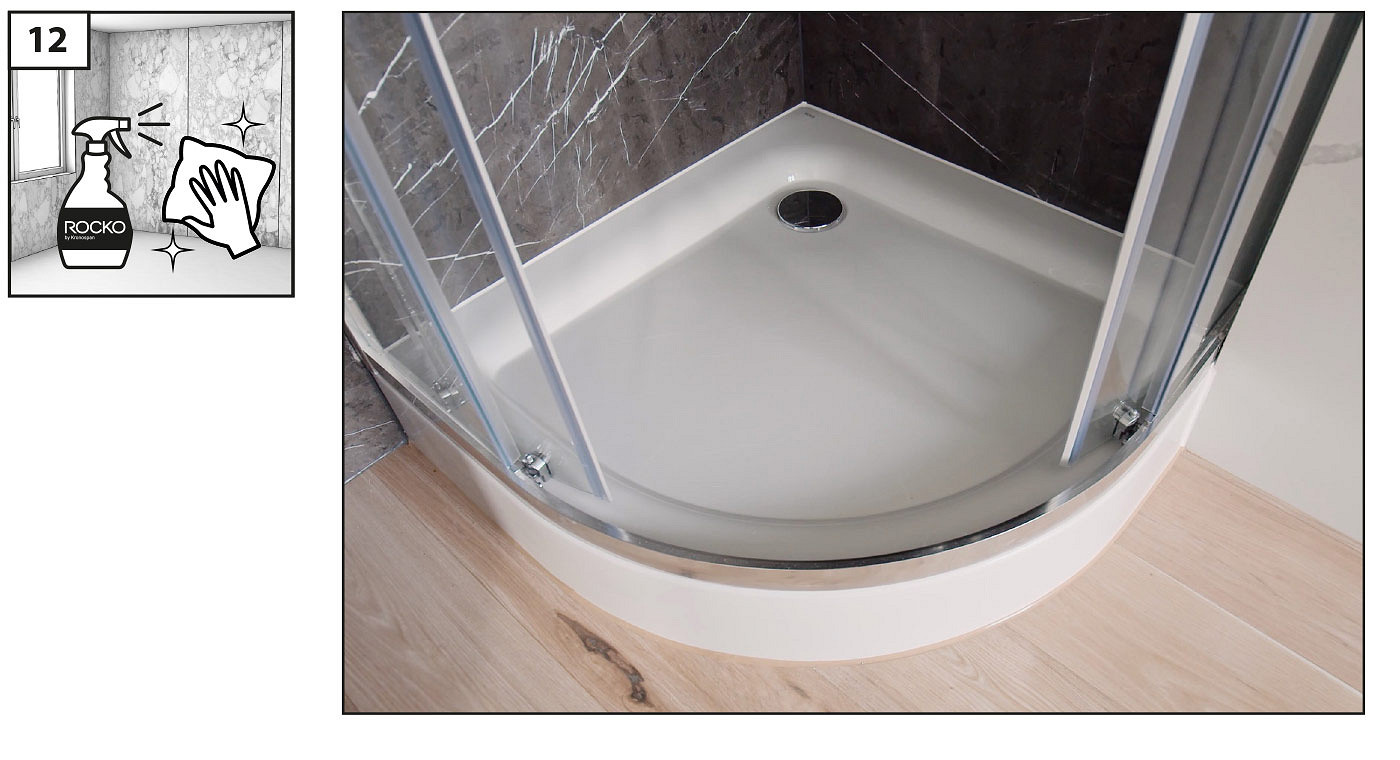
12. Cleaning the panels after assembly
The Rocko Tiles surface can be used immediately after installation. Remove dust and dirt with Rocko Tiles cleaning fluid. Wipe the boards with a damp, not too fluffy cloth (preferably microfiber). Do not use wire or nylon sponges which can damage the surface.
Click here to downolad a complete ROCKO Tiles User's Manual
WALL TILES INSTALLATION - WET ROOMS
1. Aclimatization
Prior to installation, the Rocko Tiles must be acclimated to room temperature at the installation site. The room where the hob is to be installed must be between 15oC - 30oC [59oF - 86oF]. Rocko Tiles should be stored horizontally, on an even surface, under controlled environmental conditions.
2. Installation tools / Recommended accesories
• Circular saw with guide bar
• Cutting disc - discs with a sufficiently large number of teeth are recommended, e.g. ø165mm (56 teeth) and ø350mm (108 teeth)
• Universal knife
• Ruler, tape measure, pencil
• Distance crosses, clips for leveling tiles
• Glue float, cartridge squeezer
• Broom or vacuum cleaner
• Optional: table saw, hole saw, jigsaw, assembly gripper
3. SUBSTRATE PREPARATION
3.1 SUBSTRATE REQUIREMENTS
WOOD (PLYWOOD, OSB)
• Wooden substrates must be firmly attached to the base structure; Rocko Tiles should not be mounted to unstable, poorly attached base plates
• The substrate must be load-bearing, dry, clean and degreased Ø 165mm (56 teeth) and Ø350mm (108 teeth)
• The substrate must be stable, free from cracks, bends and unevenness
CONCRETE, BRICK
• Wooden substrates must be firmly attached to the base structure; Rocko Tiles should not be mounted to unstable, poorly attached base plates
• Any convexities of the substrate must be removed by grinding; the cavities can be filled with a suitable putty and then primed
• The substrate must be hardened and seasoned according to with recommendations
CERAMIC TILES, TERAZZO, STONE
• The existing substrate must be firmly attached to the substructure; do not mount Rocko Tiles to unstable, badly attached tiles
• The surface of the tiles must be thoroughly cleaned and degreased before applying the adhesive
3.2. Subsurface leveling
The substrate must be leveled within max. 2mm by 1m in length [0.08 "by 40"]. No unevenness, deflection and faults.
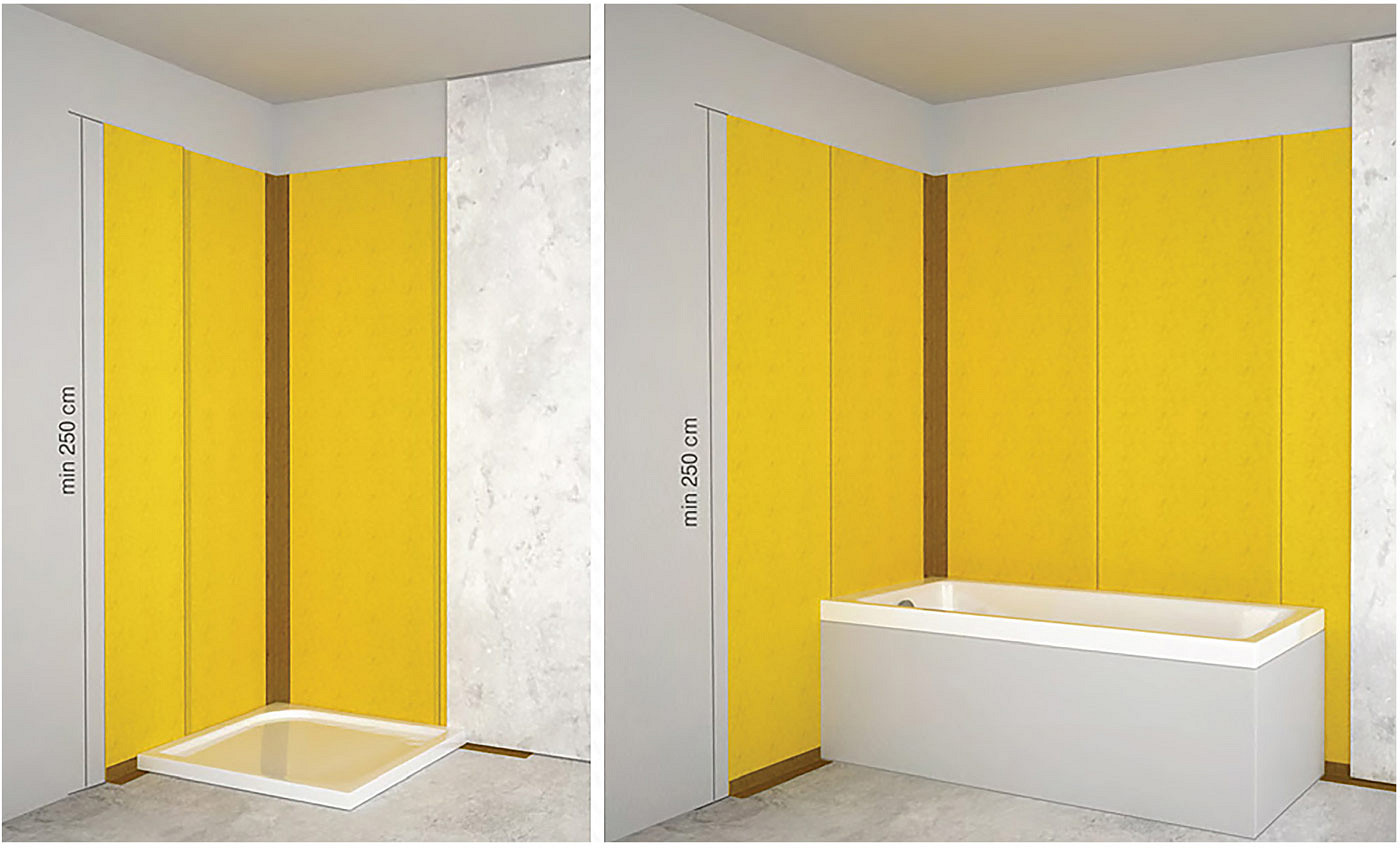
3.3. Waterproofing
Waterproofing, also known as waterproofing, anti-moisture and water-repellent insulation, protects the elements of rooms against the destructive effects of water. The walls in the cabins should be insulated to a minimum height of 2.5 m, in the rest of the bathroom it is recommended to cover wet areas. In the case of some materials, such as wood-based panels, they should be completely covered with insulation, regardless of their place of application. Waterproofing can be done with a liquid foil or a sealing mat.
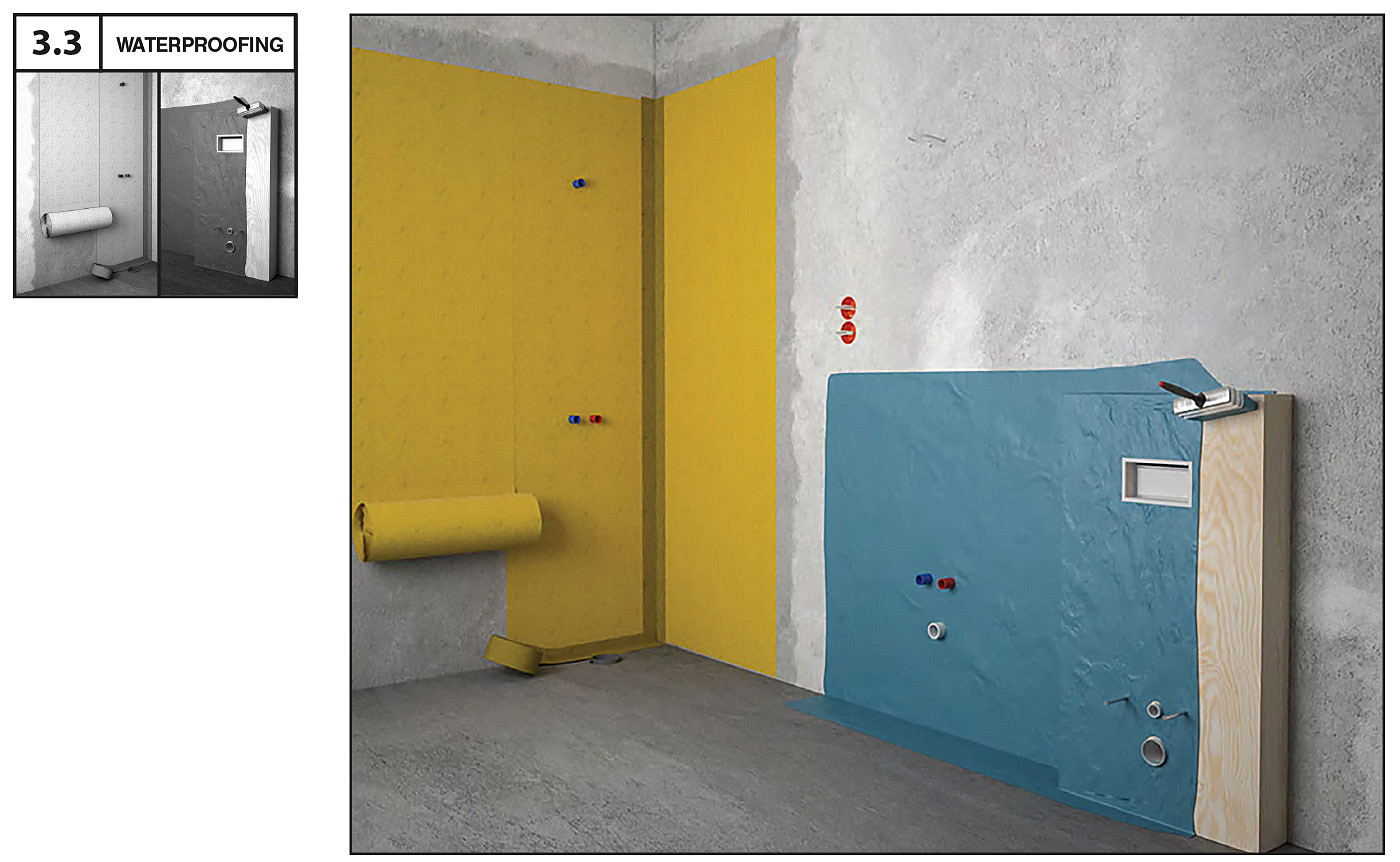
Waterproofing with liquid film
Apply the liquid foil to the surface with a roller or brush. Two layers should be applied, the second application should be made after approx. Drying of the first layer. One layer dries about 3 hours at 23 ° C. The panels can be installed after the liquid foil is completely dry, i.e. after approx. 24 hours.surface, cut holes in the board before its installation. Depending on the shape, the holes can be cut with a hole saw or a jigsaw.
Waterproofing with sealing mat
• We start the work with applying a highly flexible C2 class adhesive to the substrate
• Put the sealing mat on the freshly applied layer of mortar, then press and smooth from the center of the mat to its edge so that there are no air voids under the mat. Sealing mat strips should overlap 5 cm
• WARNING: the sealing mat must not be left as the final layer for more than 2 months
• corners and expansion joints should be sealed with a sealing tape, after shaping it slightly. Pasting should be performed with the use of a polymer glue-sealant
• Seal internal and external corners by gluing in ready internal and external corner fittings
• After the adhesive materials have cured and cured in accordance with the manufacturer's recommendations, you can proceed to the next stages of Rocko panels assembly
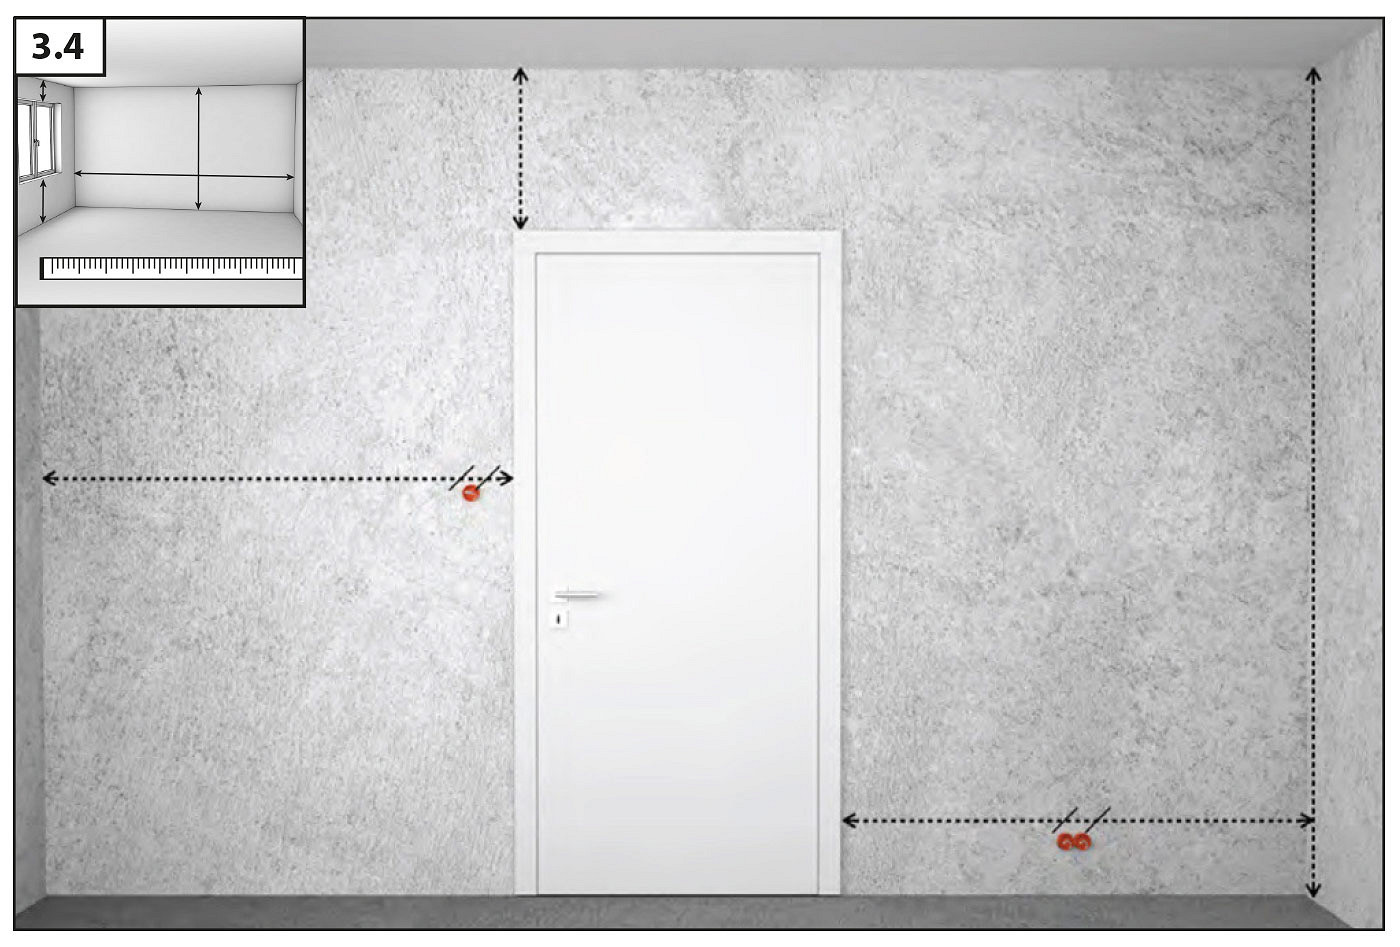
3.4. Surface dimensions
Before starting the installation, measure the lengths of the walls on which the Rocko Tiles will be installed. A properly planned layout of the plates prevents very narrow elements and allows keeping the proportions.
4. Formating ROCKO Tiles
Format the boards with a circular saw with a guide. For cutting, we recommend using discs with a sufficiently large number of teeth, e.g. Ø165 mm (56 teeth) and Ø350 mm (108 teeth). Remember to cut the board with the decorative surface facing up. If there are electrical sockets or other installation components on the wall surface, cut holes in the board before its installation. Depending on the shape, the holes can be cut with a hole saw or a jigsaw.
5. Cleaning of board surface
The cut boards must be cleaned. The bottom surface of the boards, on which the glue is to be applied, must be free of dust, dry and degreased to ensure proper adhesion of the glue.
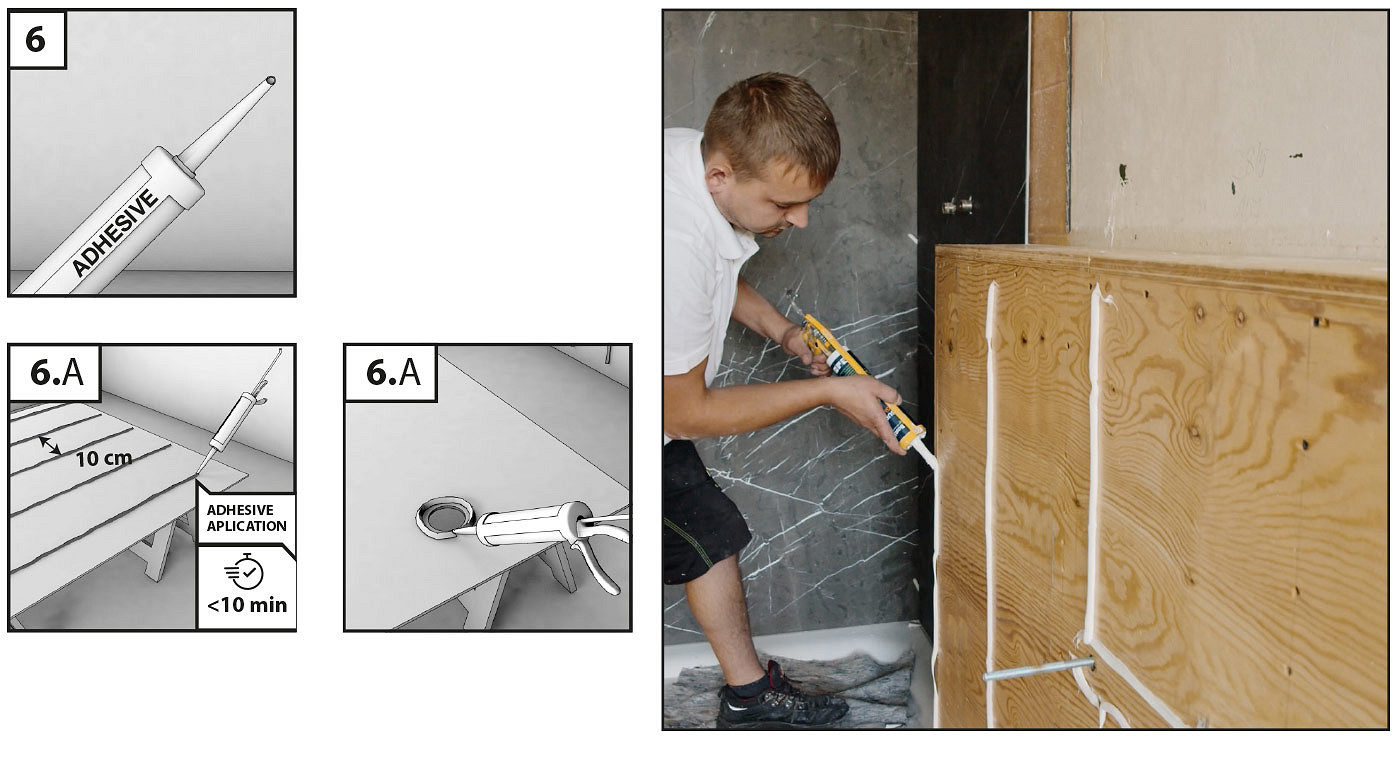
6. Application of adhesive from tube / cartridge / foil package
A. APPLICATION OF ADHESIVE
Apply the mounting adhesive to the bottom side of the panel or the wall surface. If you are using glue in a cartridge or foil-packet, apply it in vertical stripes at 10 cm intervals. Do not apply the glue in spots. Apply glue under the outline of each cut-out hole. The glued surfaces should be joined within 10 minutes of application of the adhesive.
7. Adhesive application with a trowel
Apply the mounting adhesive to the bottom side of the panel or the wall surface. Apply the glue to the entire surface of the glued board. Do not apply the glue in spots. The glue is applied with a trowel (C1) 4x4x4 mm. The glued surfaces should be joined within 40 minutes from the application of the adhesive.
8. Panels adhering to the surface
Apply the glue, then place the board against the wall and press it. For optimal durability, press the glued elements so that there is a 2-3 mm ventilation gap between them. You can use levellers. Gap between glued elements ensure that the adhesive joint is able to permanently transmit the deformation.
9. Board leveling
After gluing the first board, place the leveling clips - they will allow for the expansion of the expansion gap between the boards (2-3mm) and will facilitate the leveling of the surface. After sticking the next board, level the adjacent surfaces. Do not remove the leveling clips until the adhesive has set. Continue with the assembly of the next plates.
10. Removal of the clips and protective film
The curing speed of the adhesive depends on the ambient temperature and air humidity (24-48 h). As the temperature and humidity level increase, the polymerization process is faster. Provide effective ventilation until fully cured. After completing the work and setting the glue, remove the leveling clips and then remove the protective film from the surface of the boards.
11. Filling out the dilatation
Expansion joints should be filled with a flexible joint (epoxy, silicone) or with dedicated finishing profiles (see page 7). Before applying the grout, protect the surfaces along the expansion joint with painter's tape - this will facilitate the grouting process and protect the surfaces from dirt. The profiles should be installed during the assembly of the panels. For mounting the profiles, use the same glue that you use for gluing the boards. During installation, fill the internal surfaces of the profiles with silicone in order to seal the profile-board connection.
12. Cleaning the panels after assembly
The Rocko Tiles surface can be used immediately after installation. Remove dust and dirt with Rocko Tiles cleaning fluid. Wipe the boards with a damp, not too fluffy cloth (preferably microfiber). Do not use wire or nylon sponges which can damage the surface.